Overview
Alluvial supports integration of containerized applications built using frameworks such as RShiny, Streamlit, Angular, and others.
Project administrators can embed containerized applications directly into a project. This enables teams to deliver custom apps (such as analytics dashboards or modeling tools) alongside reports, dashboards, and other project content—all accessible through the same secure, role-based interface.
IMPORTANT: The Container Administration module will eventually be deprecated in favor of the Containerized Apps module once the BETA period concludes.
What are Container Applications?
Container applications are software solutions packaged with all their dependencies (libraries, runtime, and configuration) inside lightweight, portable environments called containers. Alluvial enables users to securely access and run interactive containerized apps directly within projects.
Key Features of Container Applications
- Portability – Run consistently across environments (development, testing, production).
- Scalability – Easily deploy multiple instances to handle increased workloads.
- Flexibility – Support applications built with frameworks such as RShiny, Streamlit, Angular, and more.
- Isolation – Each app runs in its own container, minimizing conflicts with other applications.
- Efficiency – Containers are lightweight compared to traditional virtual machines.
When developing locally, use software such as Docker to run your application before deploying it.
Adding a Containerized Application
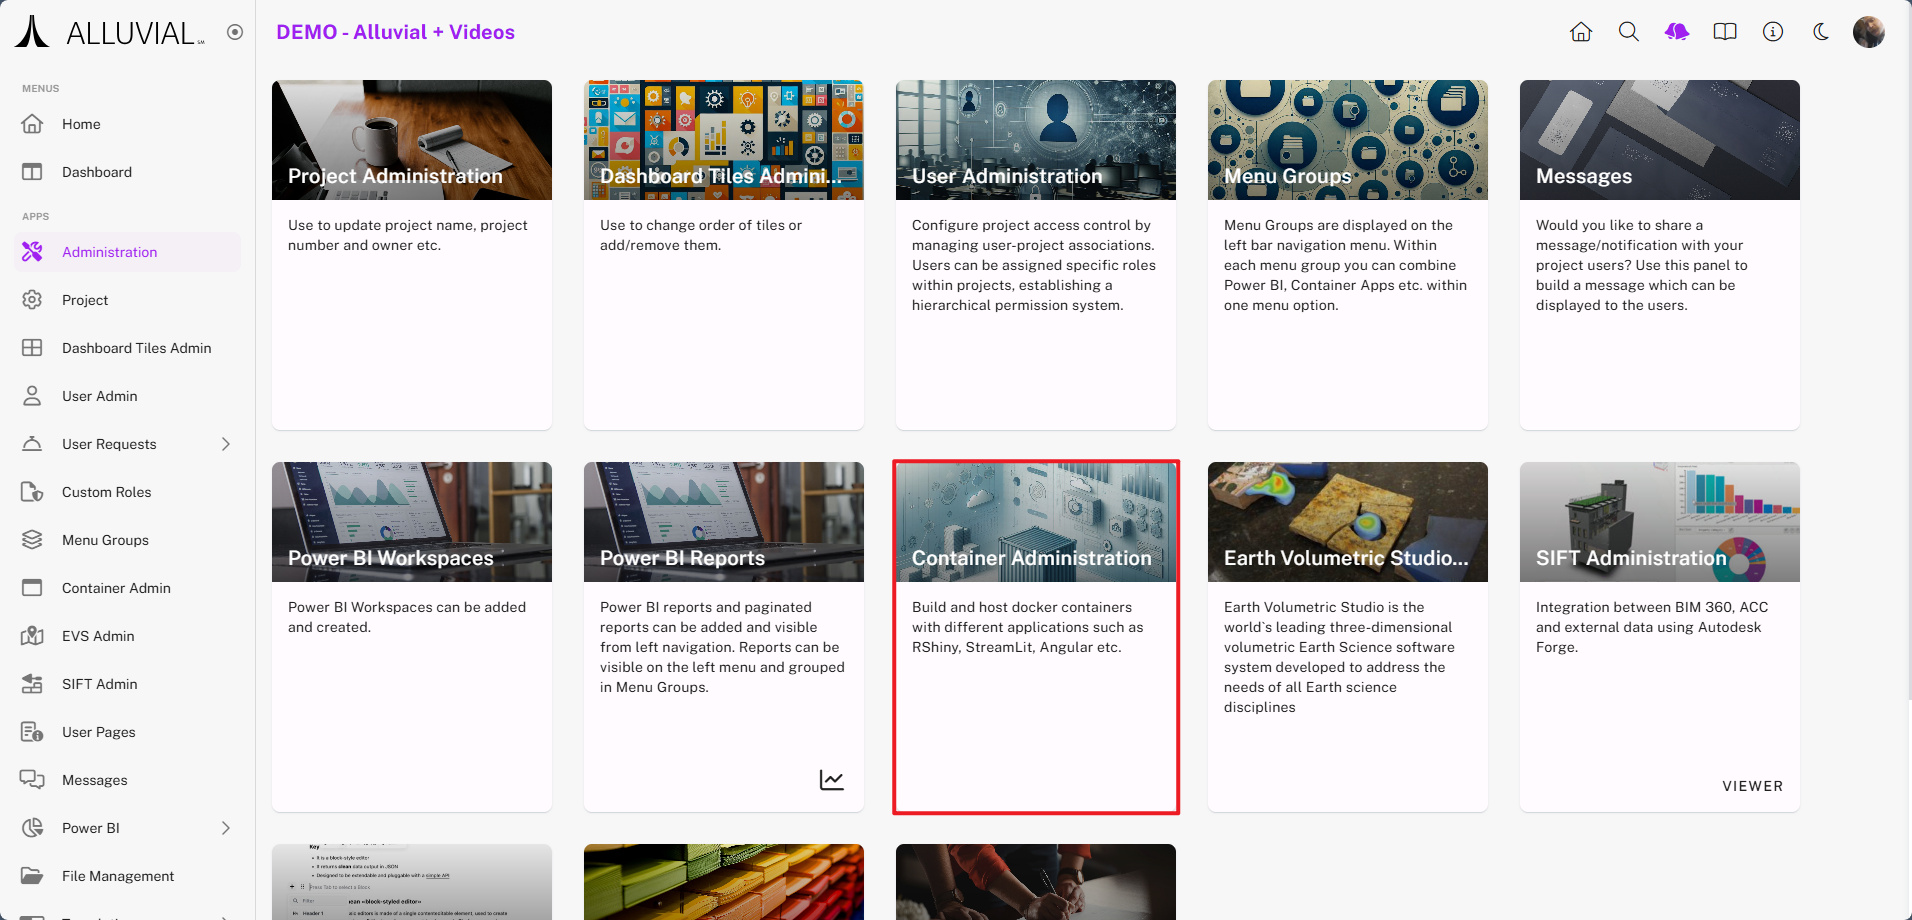
Access Container Administration
- Navigate to the administration page in your Alluvial project.
- Select Container Administration to open the project’s container search page.
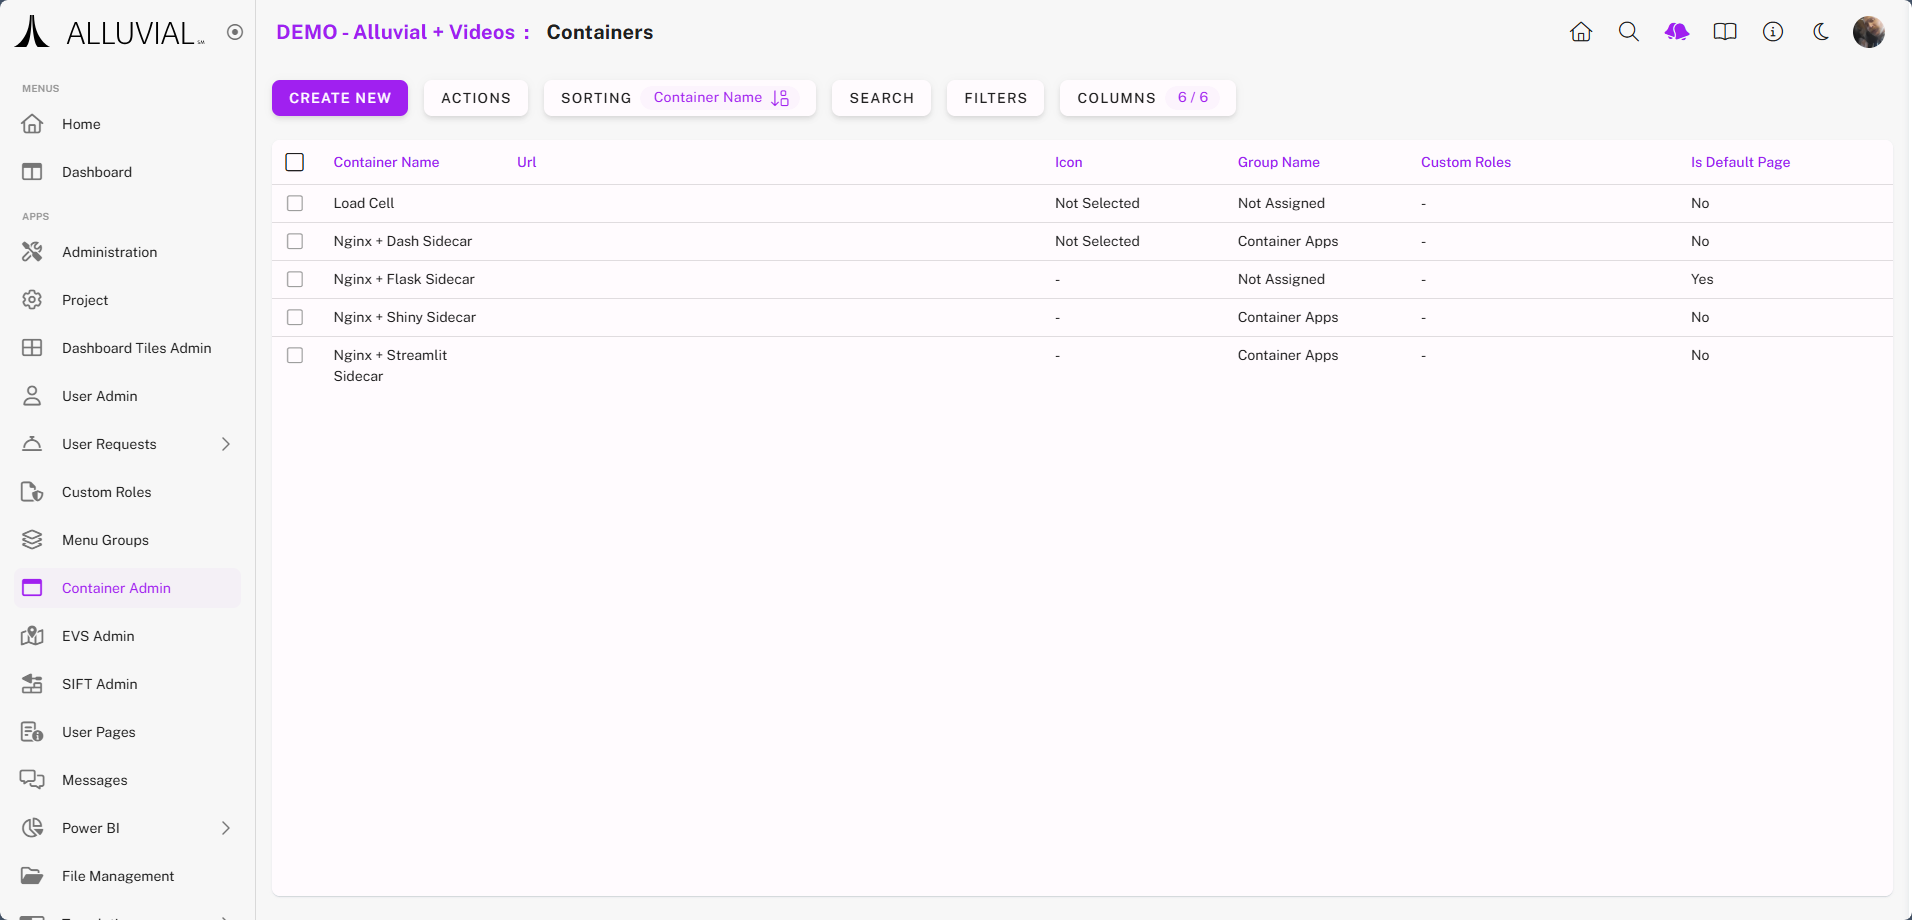
Create a New Container Entry
- If containers are already configured, they will be listed on the search page.
- To add a new containerized application, click CREATE NEW.
Complete the Container Form
You will be presented with the following form:
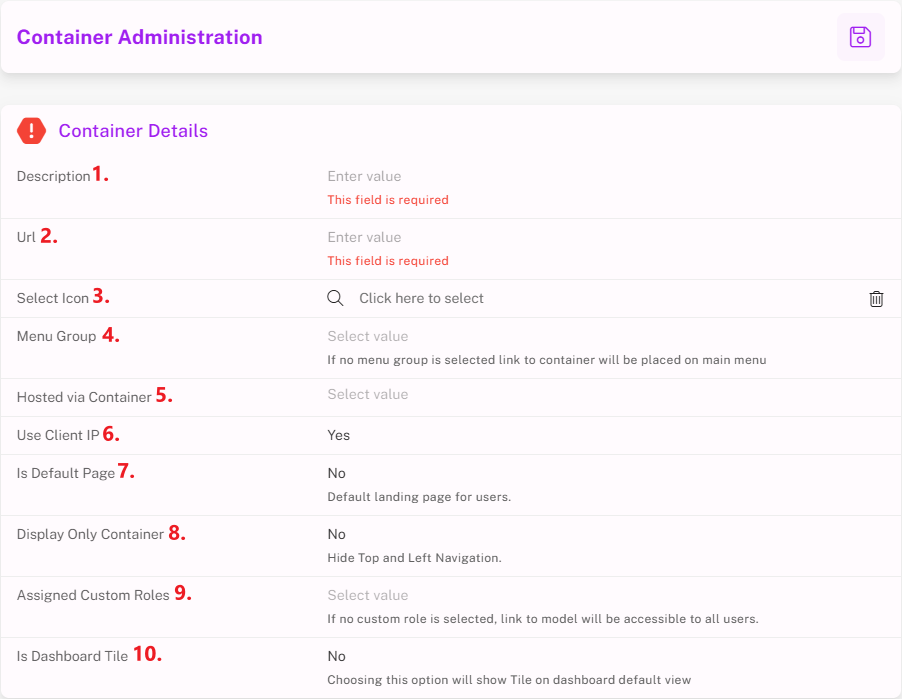
Form Fields:
- Description – Short label for the application; displayed within Alluvial.
- URL – The web application’s address.
- Select Icon – Choose an icon to represent the app in the sidebar.
- Menu Group – Assign the app to a Menu Group for sidebar organization.
- Hosted via Container – Select “Yes” if hosted on a
.jacobs.comdomain; otherwise, leave blank or select “No.” - Use Client IP – Select “Yes” if your container’s
nginx.confuses$clientipinsecure_link_md5; otherwise select “No” for IPv6 compatibility. - Is Default Page – Specify if this app should be the project’s default landing page.
- Display Only Container – Hide Alluvial navigation for a cleaner application view.
- Assigned Custom Roles – Define which roles have access to the app.
- Is Dashboard Tile – Configure a dashboard tile to link to this application.
Save and Publish
Once the form is complete, save your changes. The containerized application will now be available to assigned users within Alluvial.
Container Development
Container development in Alluvial is currently evolving. At this stage, setting up and deploying containerized applications—including CI/CD—requires direct collaboration with the Alluvial Platform Team.
To begin the process or learn more, please submit a request through the support site.
Connecting Containers to File Management
Before you get started, you will need to upload data to your project through the File Management module. The following information demonstrates how to connect a container application to this data.
While this uses the R Shiny framework in the example, the underlying logic can be used regardless of your chosen development framework.
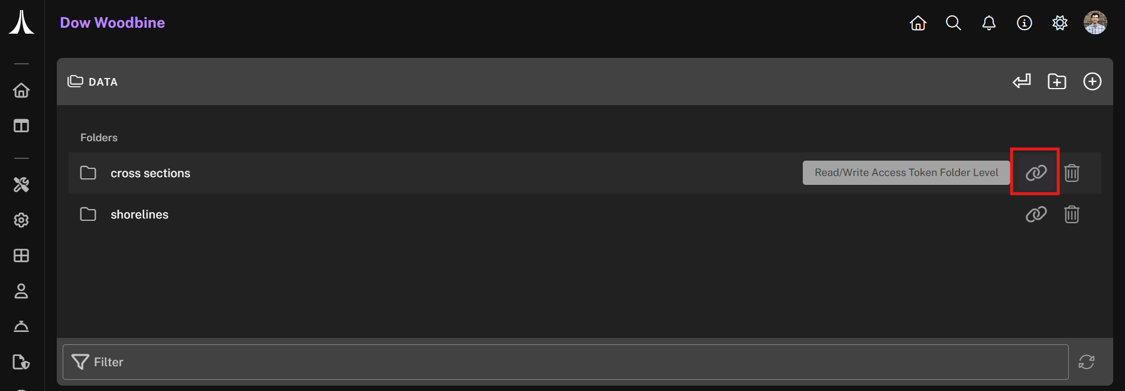
Copying a SAS Token URL
After uploading files to the File Management module, navigate to the desired directory. Hover over the folder name to display the tooltip “Read/Write Access Token Folder Level”, then copy the Read Access Token for that folder.
IMPORTANT: Copying the token at the file level will only grant access to that file, not the entire directory.
The generated URL will resemble:
https://<STORAGE_ACCOUNT>.blob.core.windows.net/appstor/<PROJECT_ID>/fileManagement/data?sv=2025-01-05&st=2025-06-08T16%3A04%3A32Z&se=2025-09-07T16%3A04%3A32Z&sr=d&sp=racwdlme&sdd=3&sig=PBMaYisrg6T77TLJ1sx%2F0itEvB9Vo6TJii85YbN8OZg%3D
The key URL components are:
- Azure Storage URL:
https://<STORAGE_ACCOUNT>.blob.core.windows.net - Azure Container Name:
appstor - Alluvial Directory Path:
<PROJECT_ID>/fileManagement/data - SAS Token:
sv=...&sig=...
The SAS token is temporary and should be treated securely:
- Do not commit it to source control (e.g., Git).
- Store it locally in a gitignored
.envfile. - In GitHub, store it as a repository secret.
- In production, use an environment variable in the Azure Web App.
For more details on SAS token structure and usage, refer to Create a service SAS - Azure Storage.
Connecting an R Shiny Application
Use the following R code to connect your R Shiny application to the Azure storage directory:
az_endpoint <- AzureStor::storage_endpoint(
  "https://<STORAGE_ACCOUNT>.blob.core.windows.net",
  sas = Sys.getenv("AZ_SAS_TOKEN")
)

az_container <- AzureStor::storage_container(az_endpoint, "appstor")

AzureStor::list_blobs(az_container, "<PROJECT_ID>/fileManagement/data")
This returns a list of blobs in the specified directory. Typical usage includes AzureStor::(multi)download_blob and AzureStor::(multi)upload_blob for transferring files. Using smaller files will generally result in a faster user experience.