Overview
The SIFT (Software for Intelligent Filtering and Transformation) module in Alluvial lets you extract and analyze Building Information Modeling (BIM) data from Autodesk Construction Cloud (ACC), formerly known as BIM 360.
After you process a model in SIFT, you can load the resulting data into Power BI and explore it with the SIFT visual.
IMPORTANT: SIFT is a specialized module that requires a custom Power BI visual before you can visualize processed model data. Contact the Alluvial platform team to obtain the downloadable visual file.
Getting Started
Prerequisites
Before starting, ensure you have:
- Administrator access to your Alluvial workspace
- Autodesk Construction Cloud (ACC) permissions
- SIFT module permissions enabled
- Power BI Desktop installed
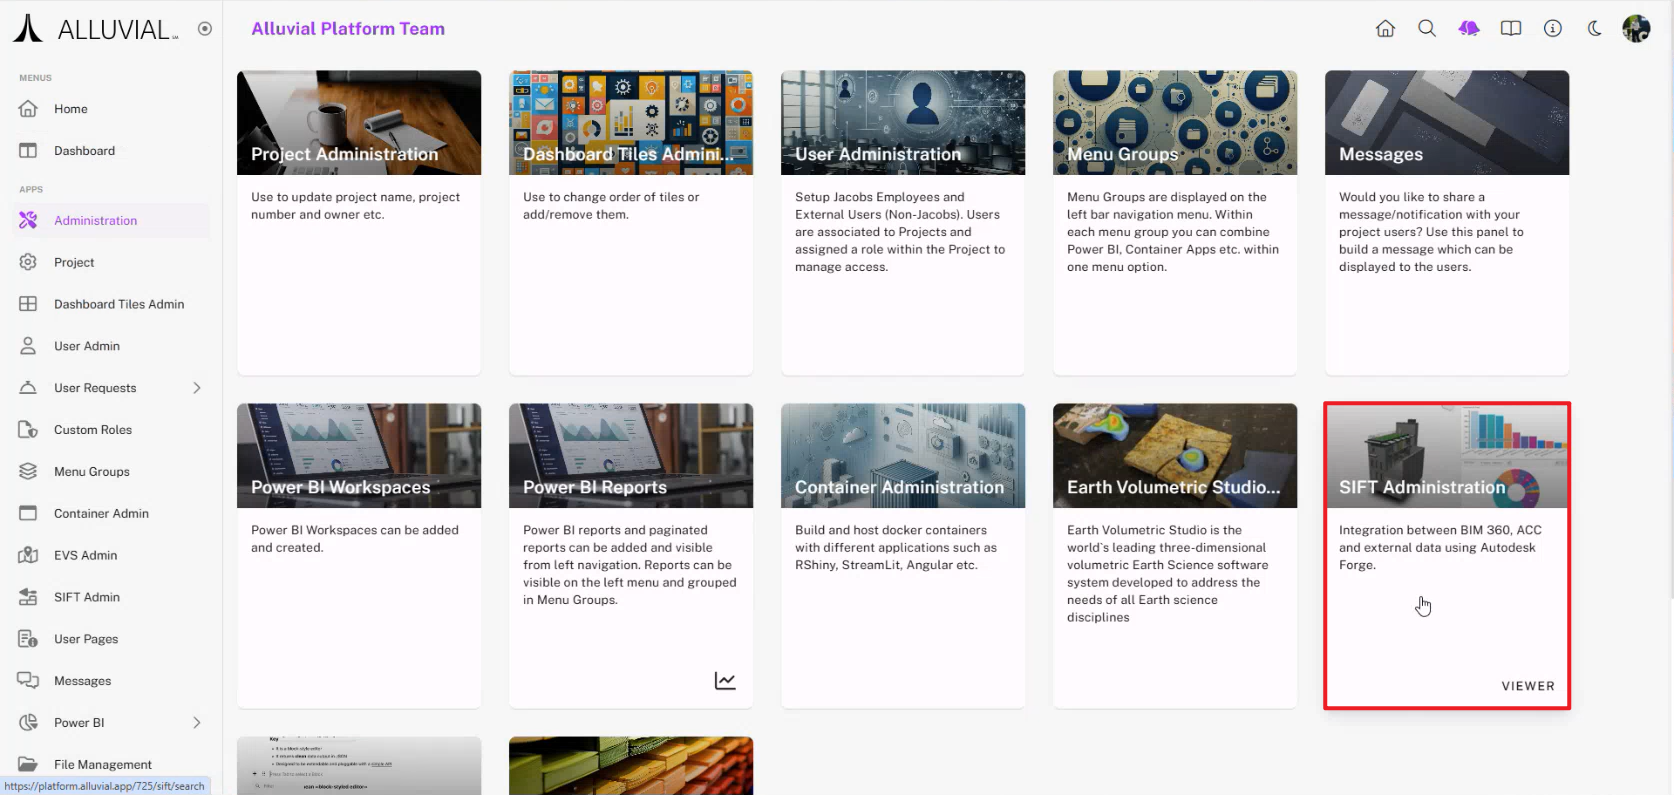
Access the Module
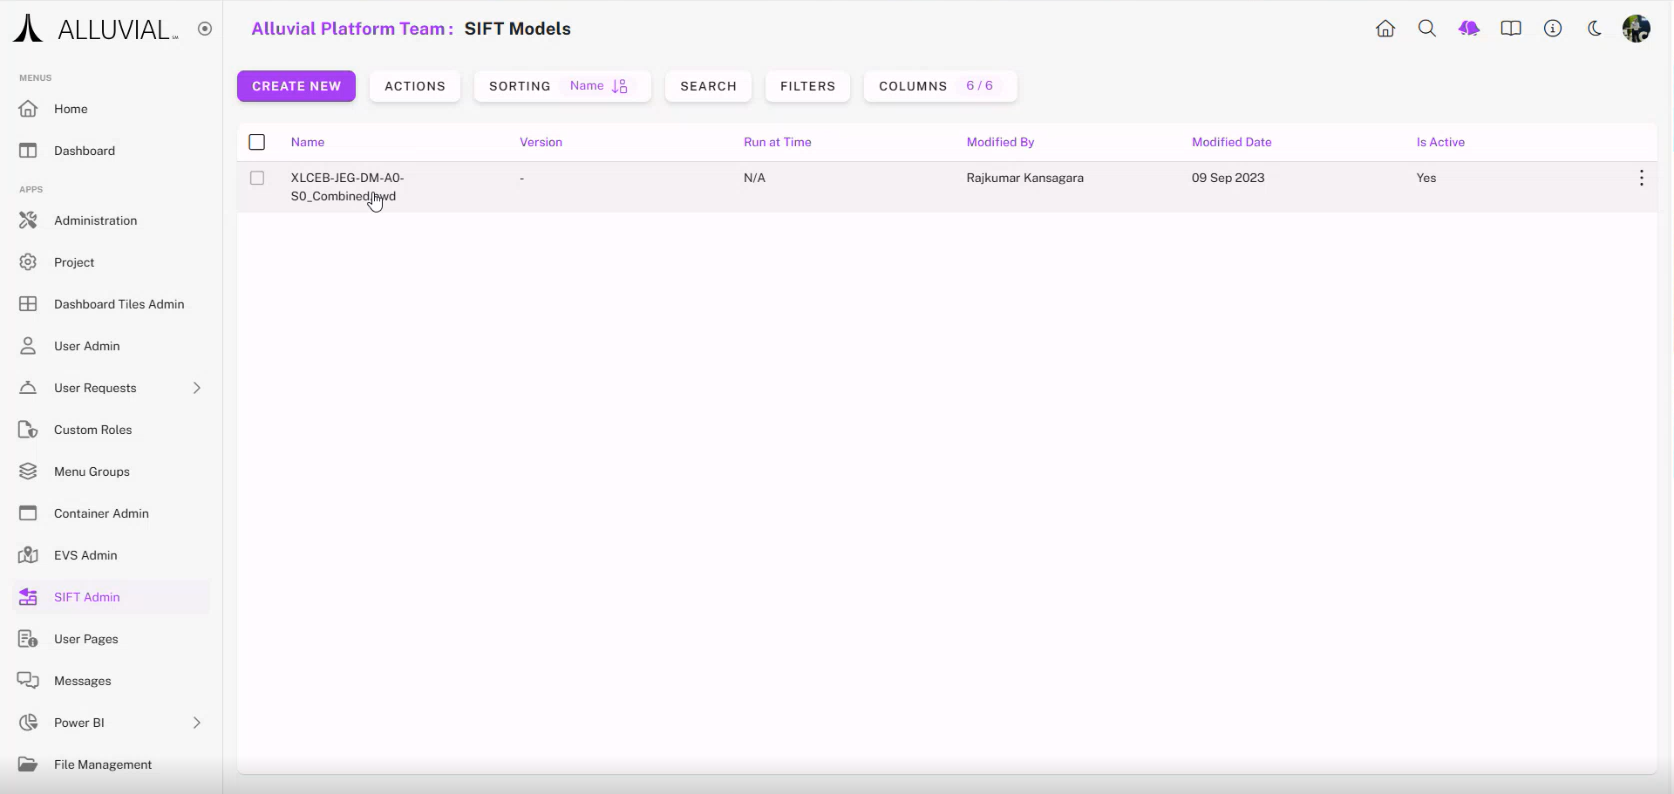
- Navigate to your project workspace and open SIFT Administration.
- The project SIFT Search page opens.
- From this page, you can create a new model and manage existing SIFT models.
Create a New Model
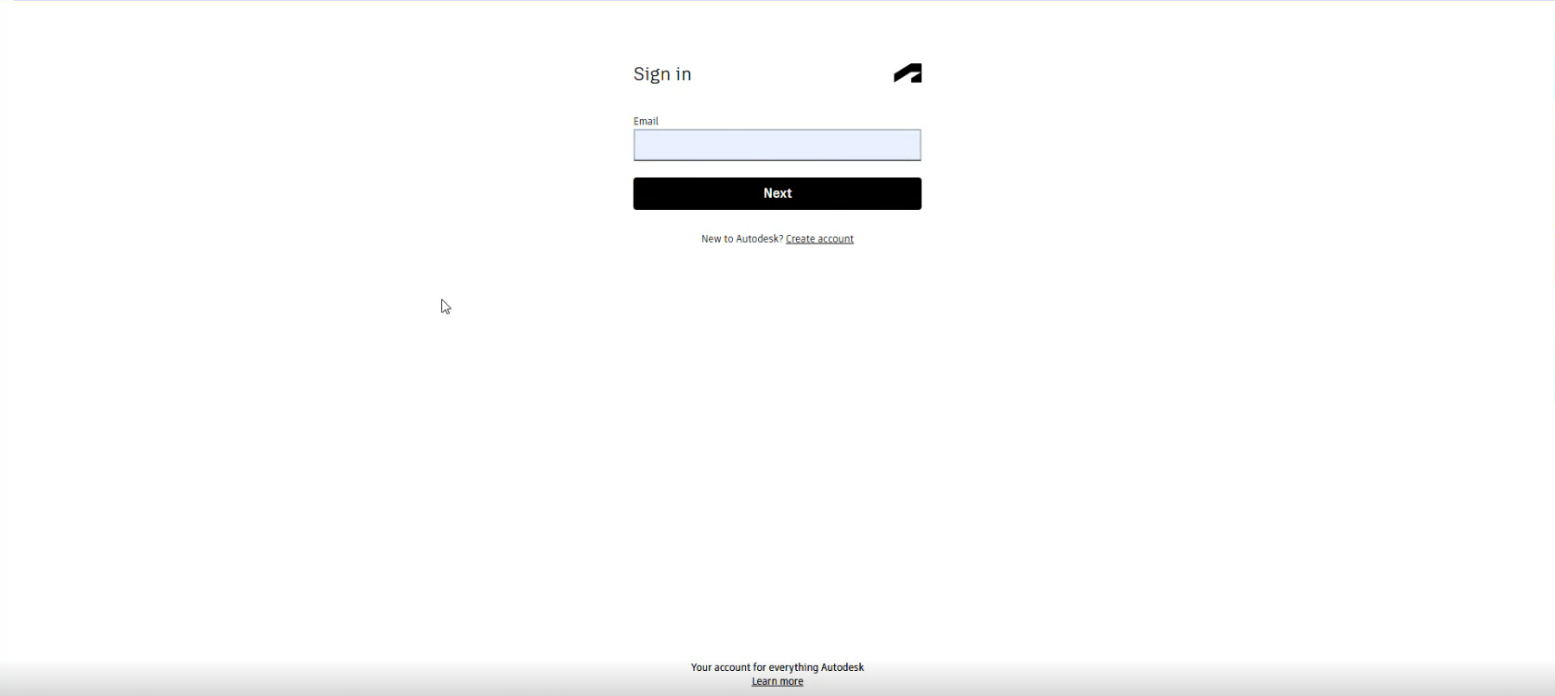
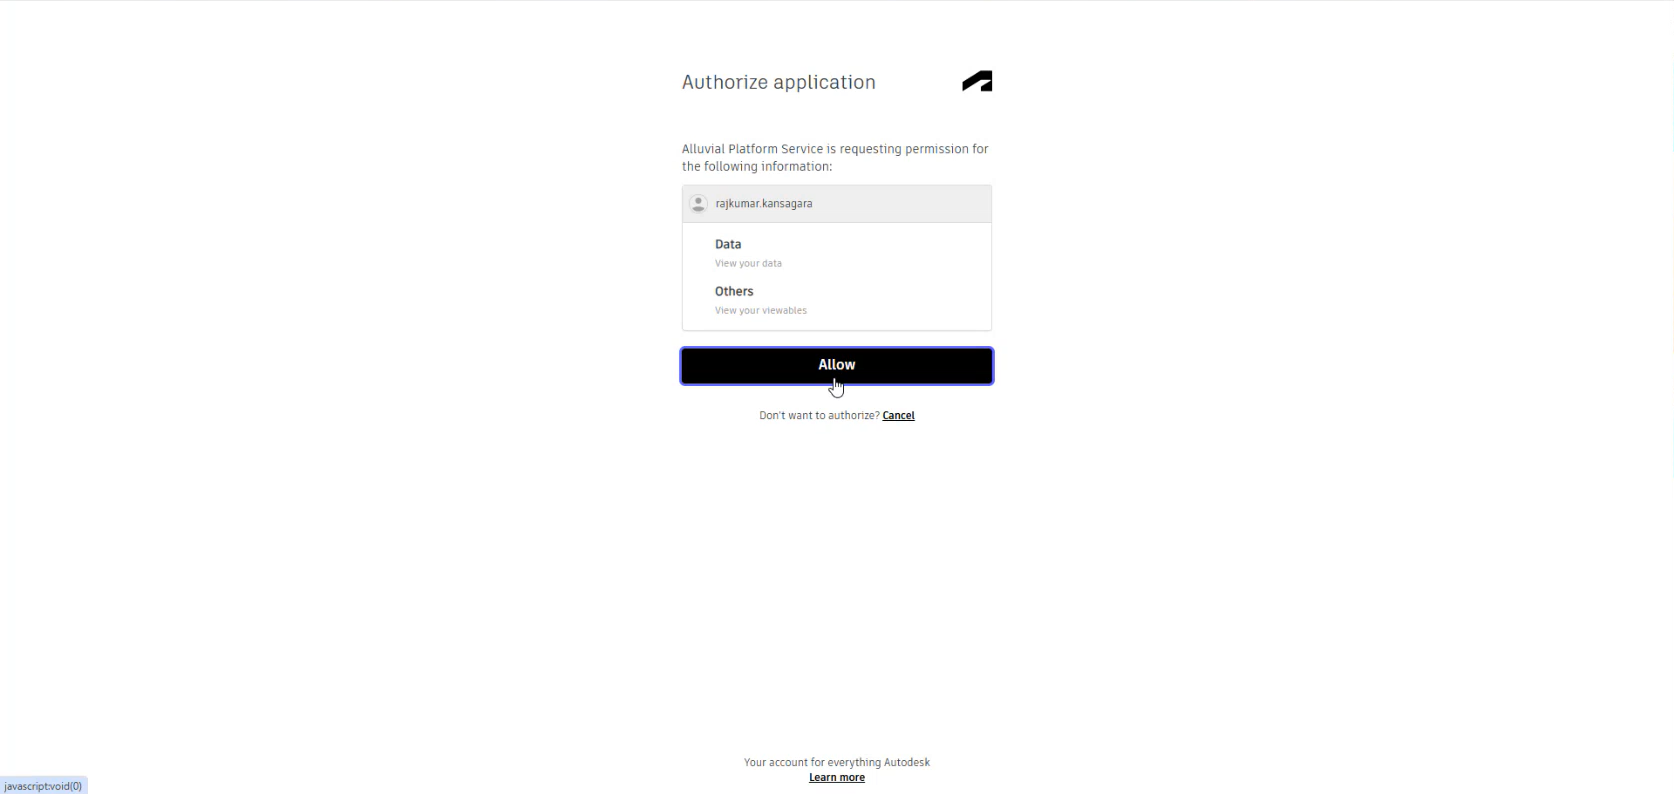
- Click CREATE NEW. You will be redirected to Autodesk sign-in.
- Enter your email and click Next.
- Authorize the application.
- Select the appropriate hub (for example, US, EU, or Sandbox) and choose the ACC project you want to use.
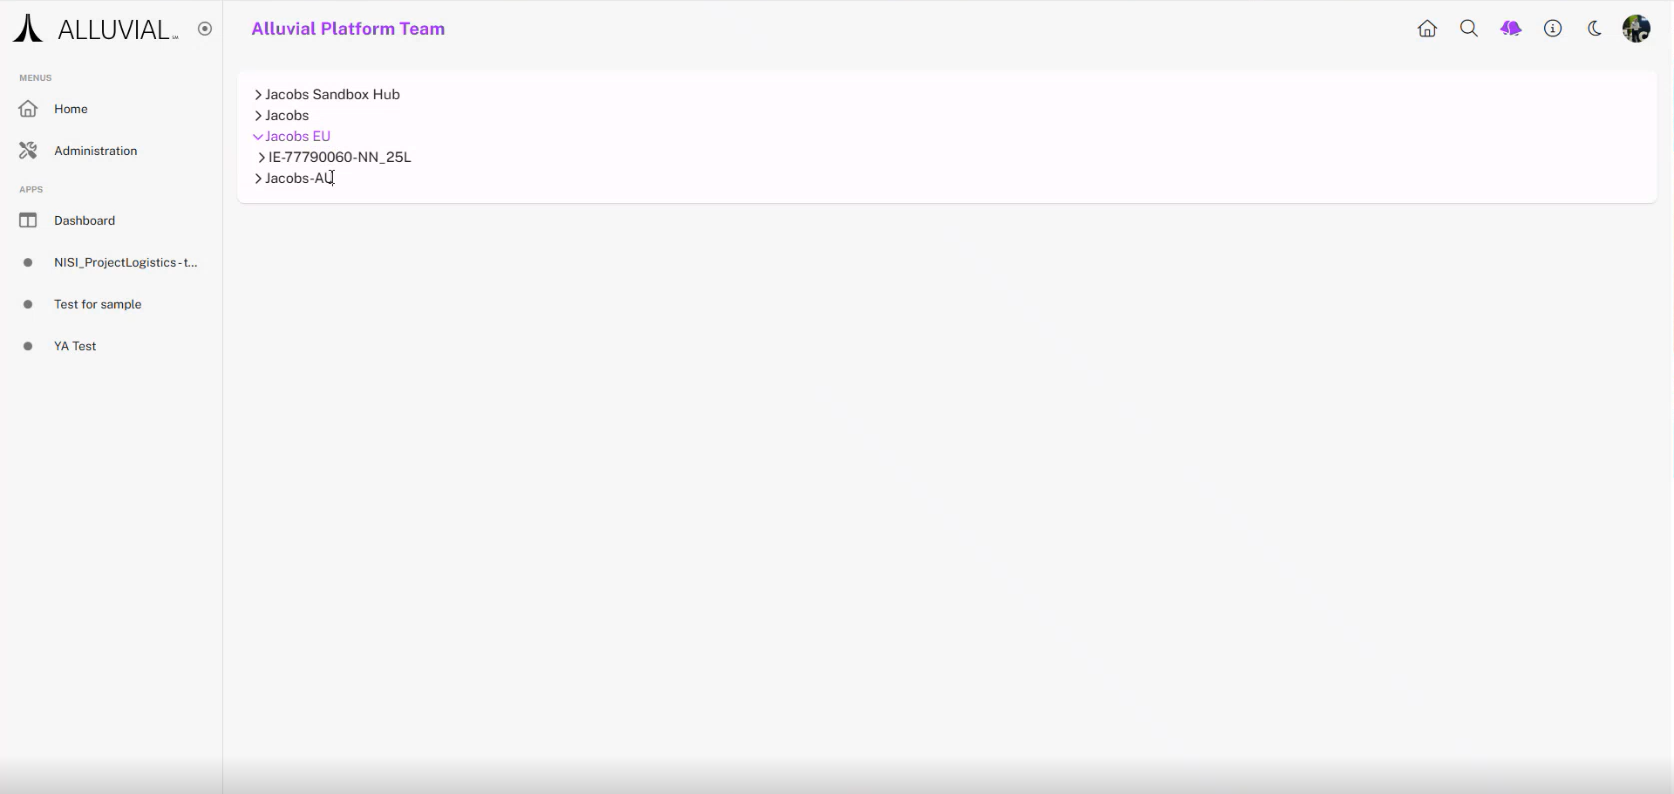
- Select the model you want to analyze.
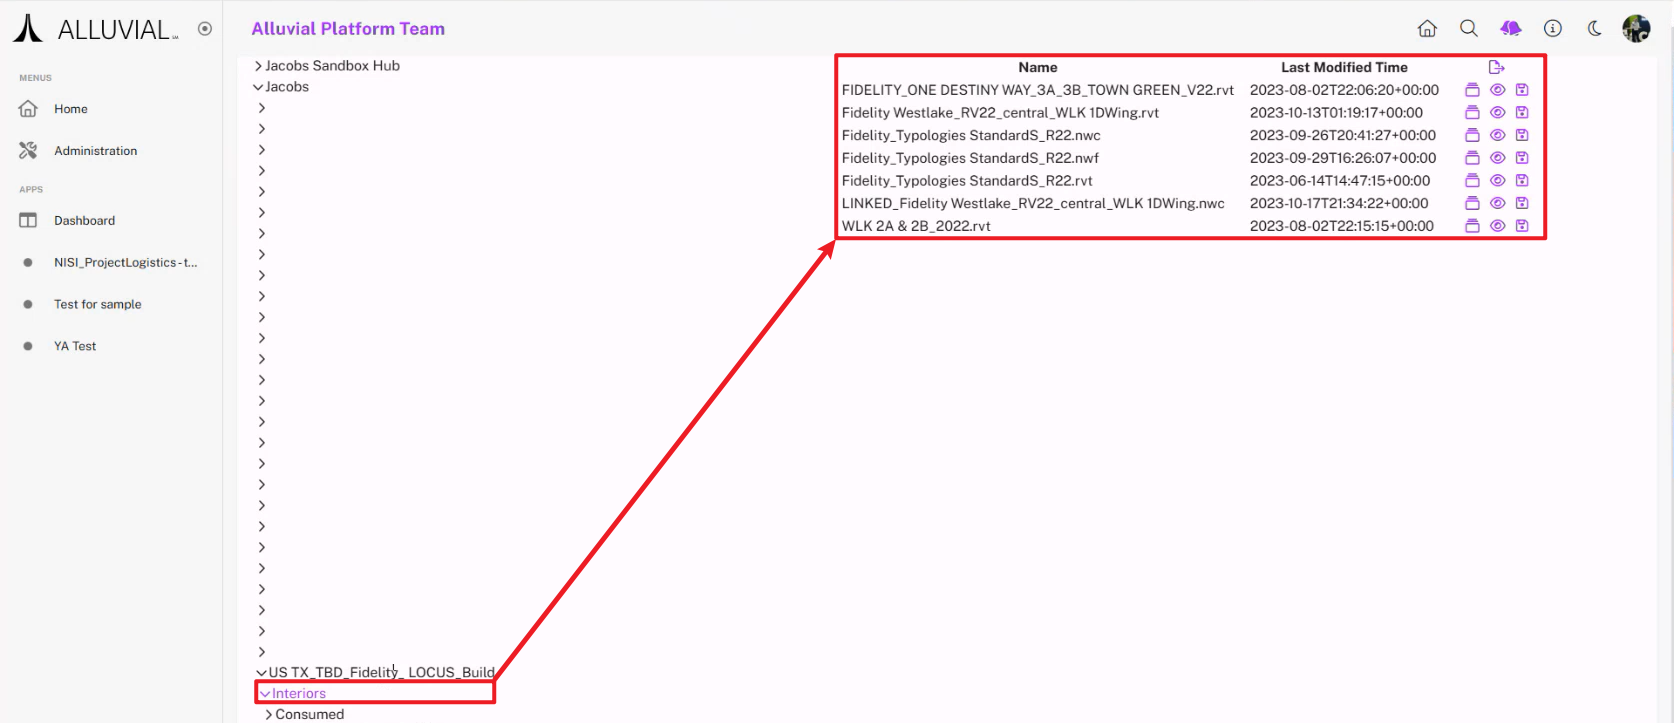
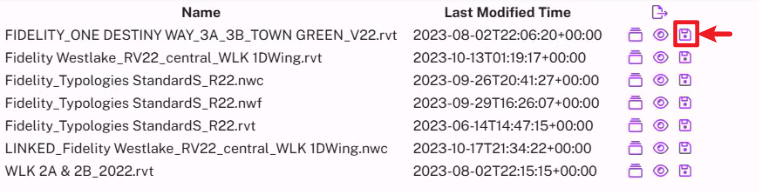
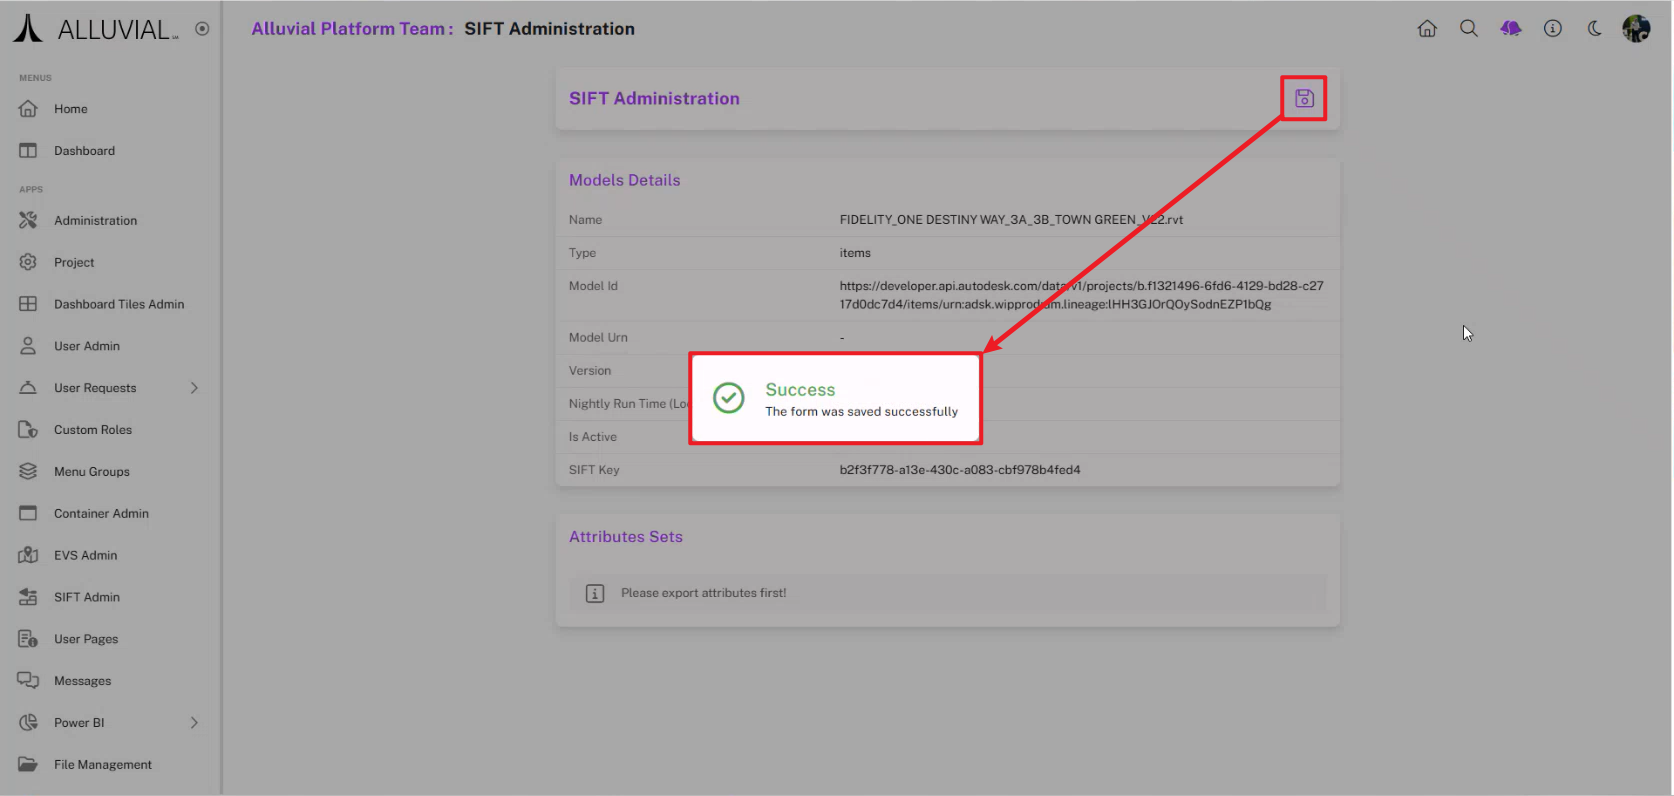
- Click the Save icon to store the model in SIFT and generate a Model ID.
- The model details page opens. Click Save on that page to finish adding the model.
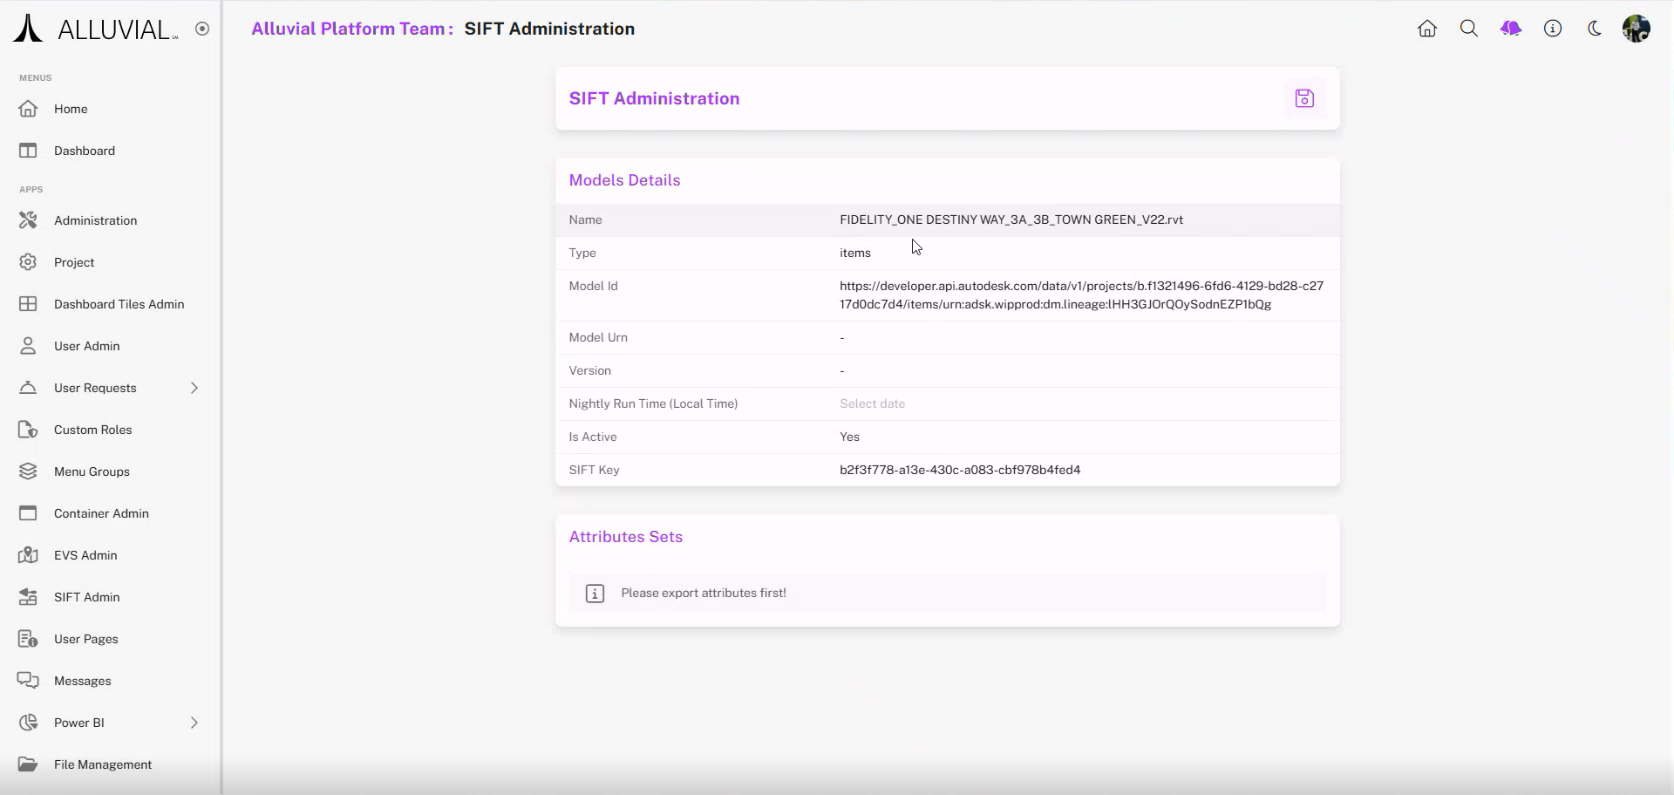
IMPORTANT: When you first save a model, the details page may take time to appear while background processing runs. Do not refresh or close the page.
The project SIFT Search page will now display the newly added model.

Core Concepts
SIFT Workflow
SIFT follows a staged workflow:
- Add a model from ACC into Alluvial.
- Extract attributes so SIFT can read the available BIM metadata.
- Create one or more attribute sets to control which fields are included.
- Process an attribute set to generate the output used by Power BI.
- Load the processed model URL and SIFT key into Power BI for analysis and visualization.
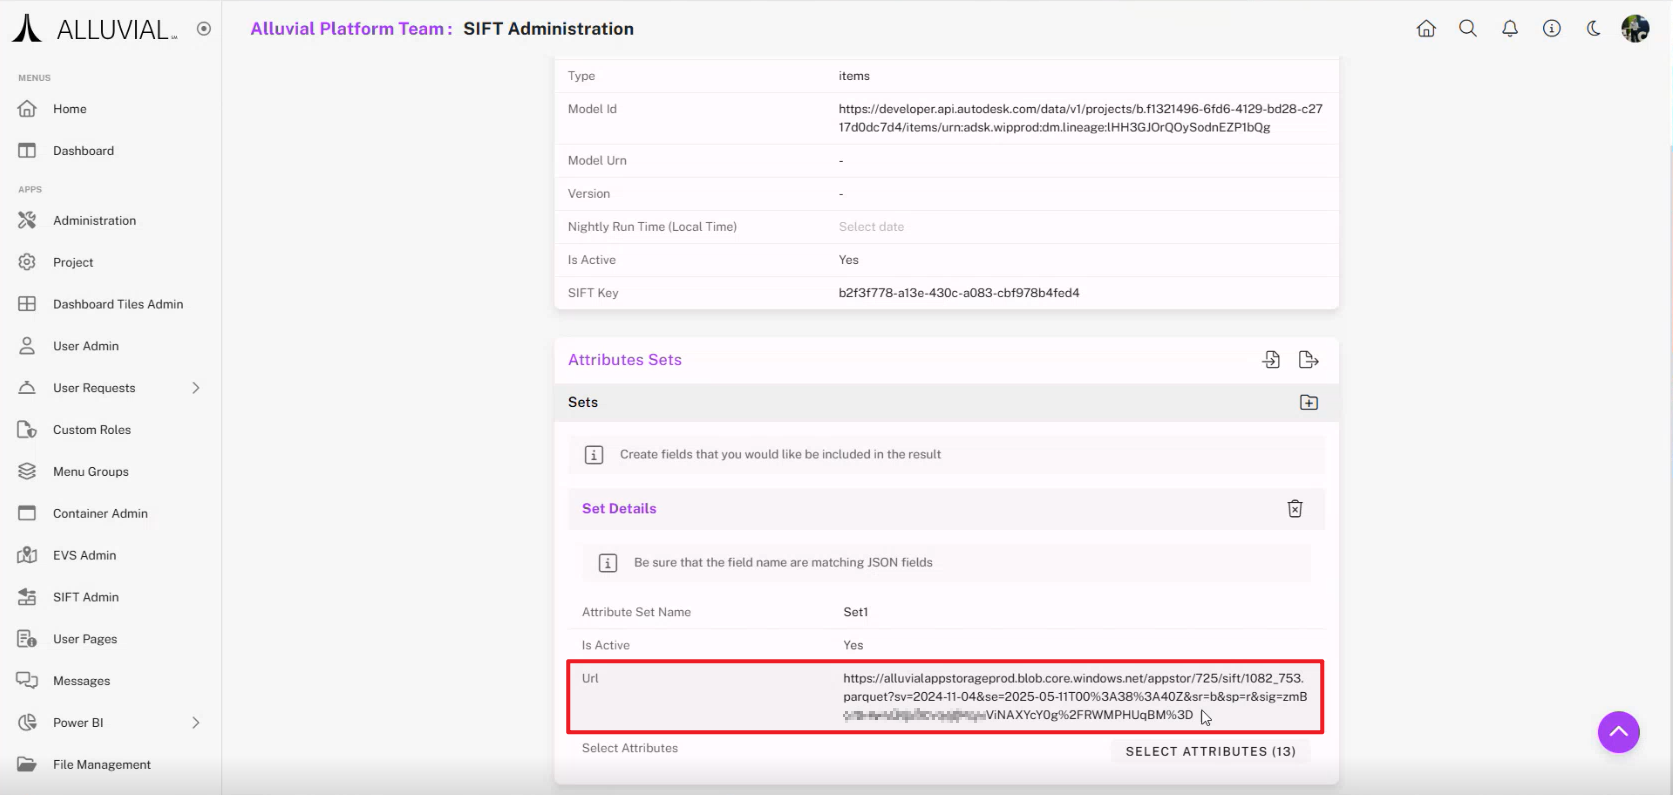
Attribute Sets and Processed Output
Attribute sets determine which model fields are included in the processed dataset. Keeping your selection focused reduces processing time and improves Power BI performance.
After processing completes, SIFT generates a URL backed by Azure Blob Storage and protected by a SAS (Shared Access Signature) token. This URL becomes the data source used in Power BI.
Power BI Integration
The SIFT visual is used to display processed model data in Power BI. In most cases, you will:
- connect to the processed model URL using a Web data source with Anonymous authentication
- load the dataset into Power BI
- map
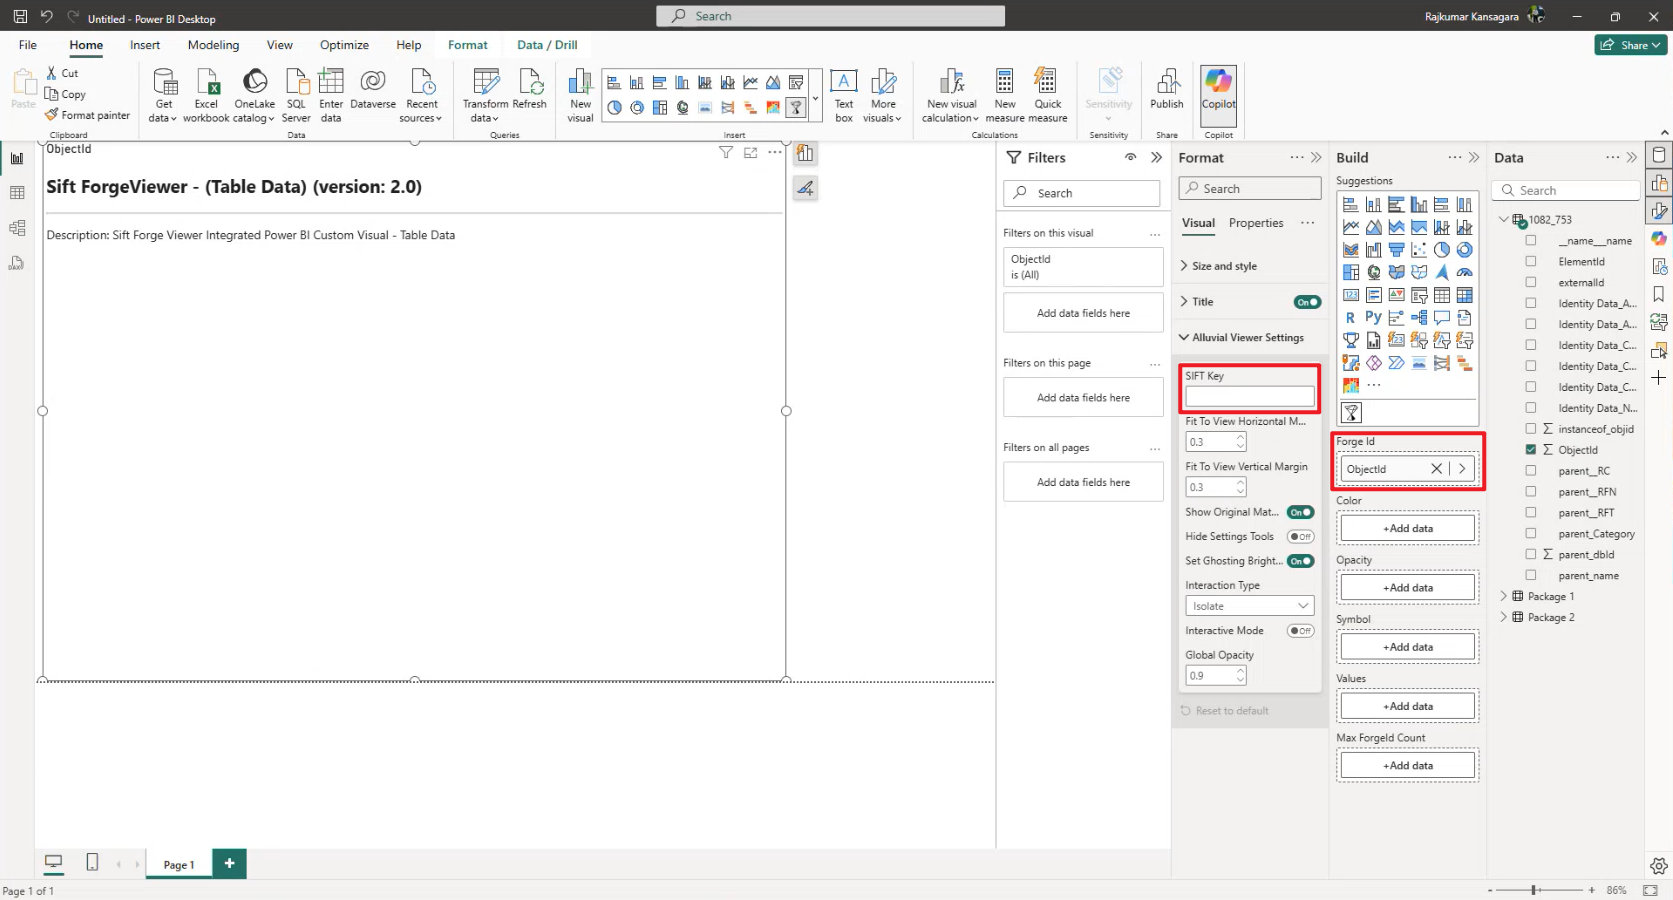
ObjectIdto Forge Id - provide the SIFT Key from the model details page
SAS Tokens
All processed SIFT URLs include a time-limited SAS token.
Tokens typically expire after 730 hours (about 30 days). When a token expires, Power BI can no longer load data from the processed model URL until you copy a refreshed URL from SIFT and update the report connection.
Common Tasks
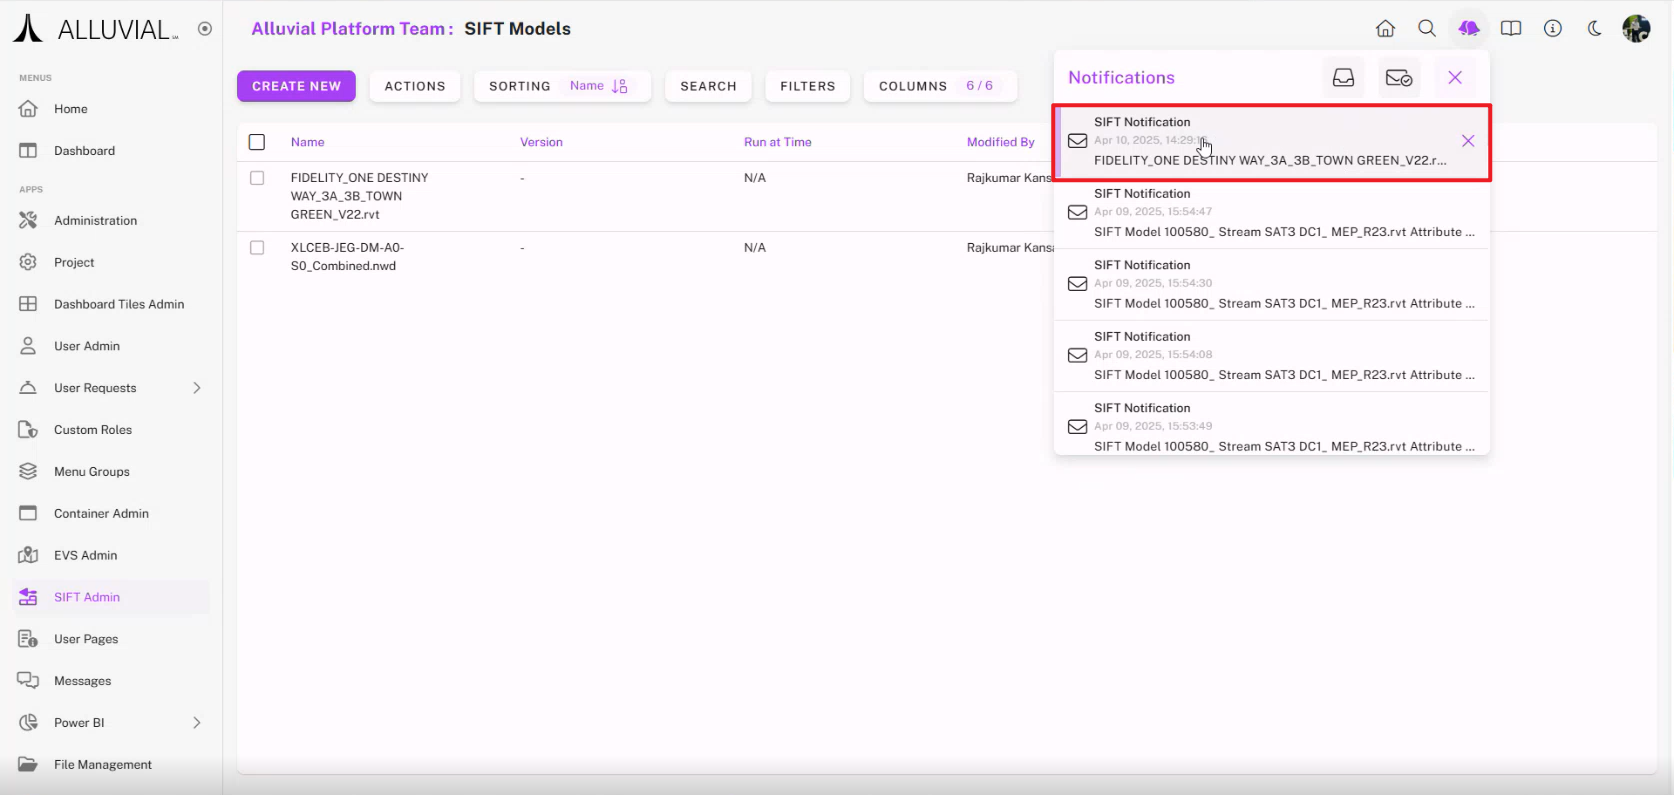
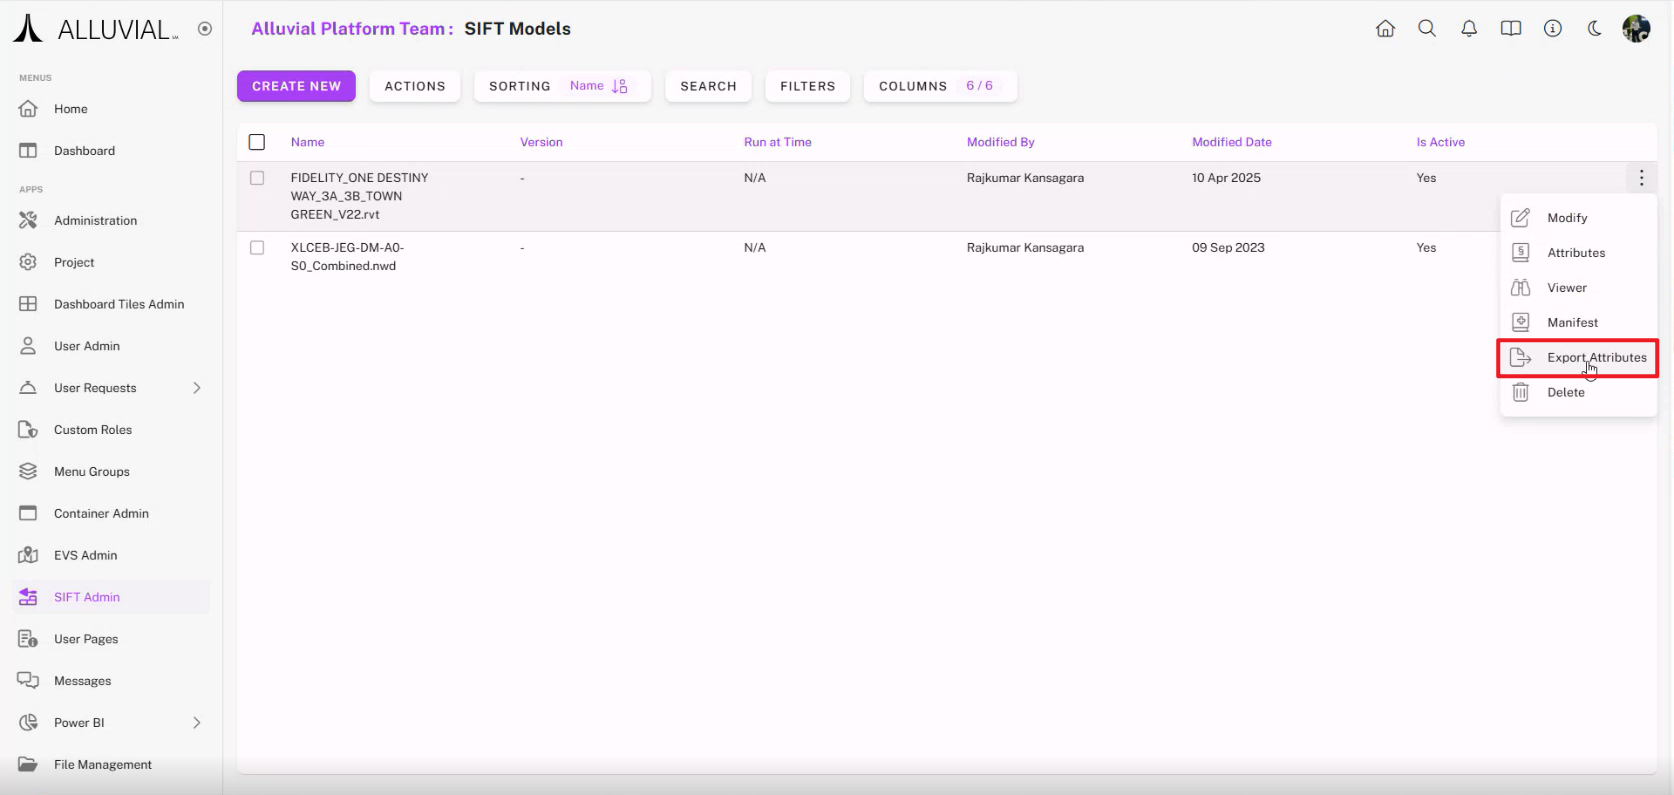
Extract Attributes
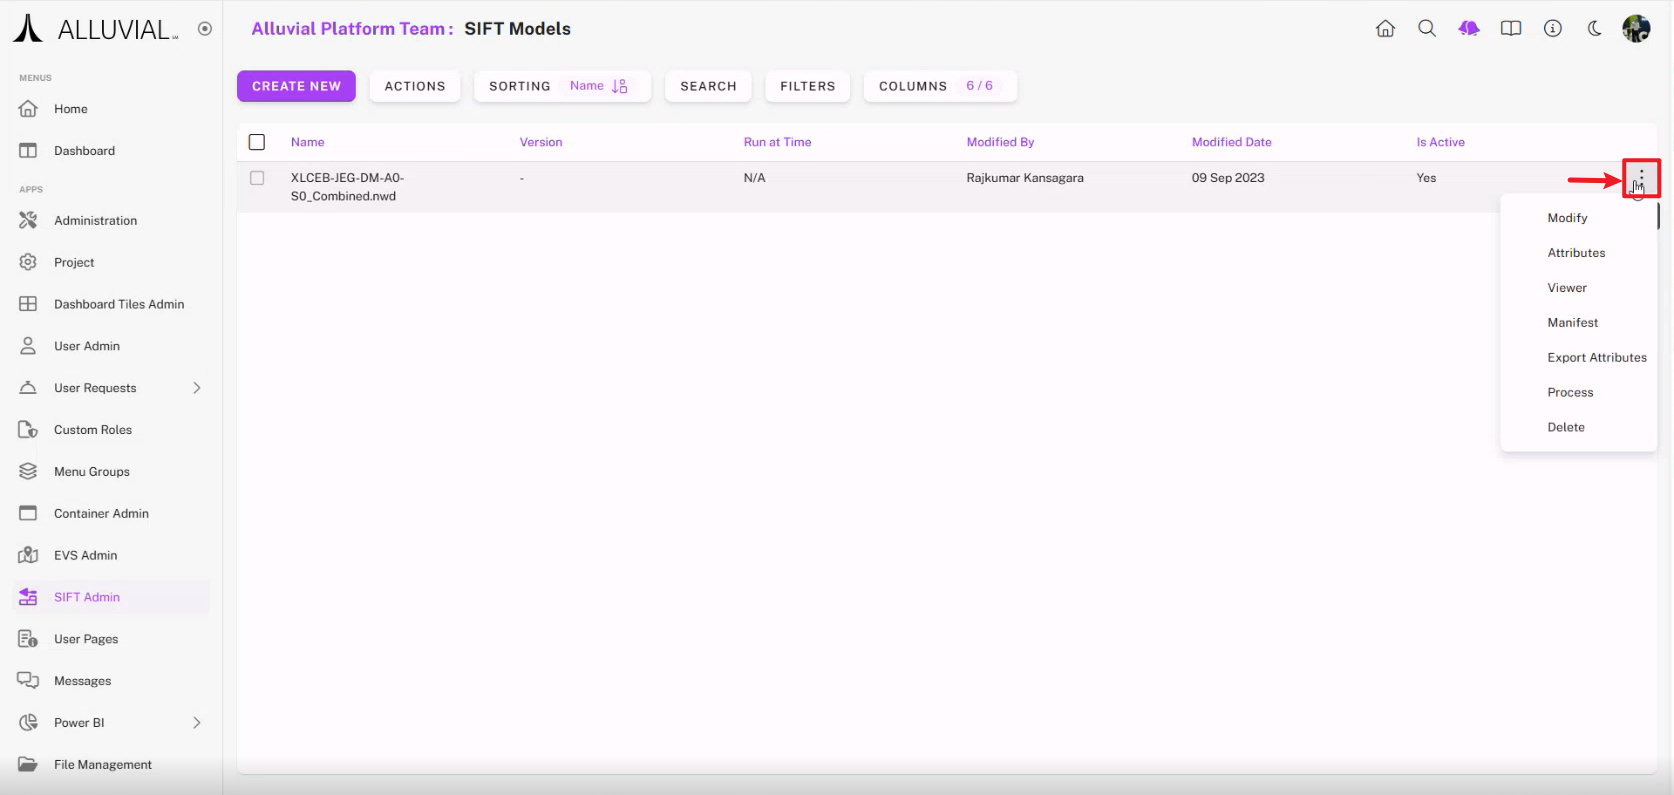
- On the SIFT Search page, locate your model.
- Click the ellipsis (⁝) and select Attributes.
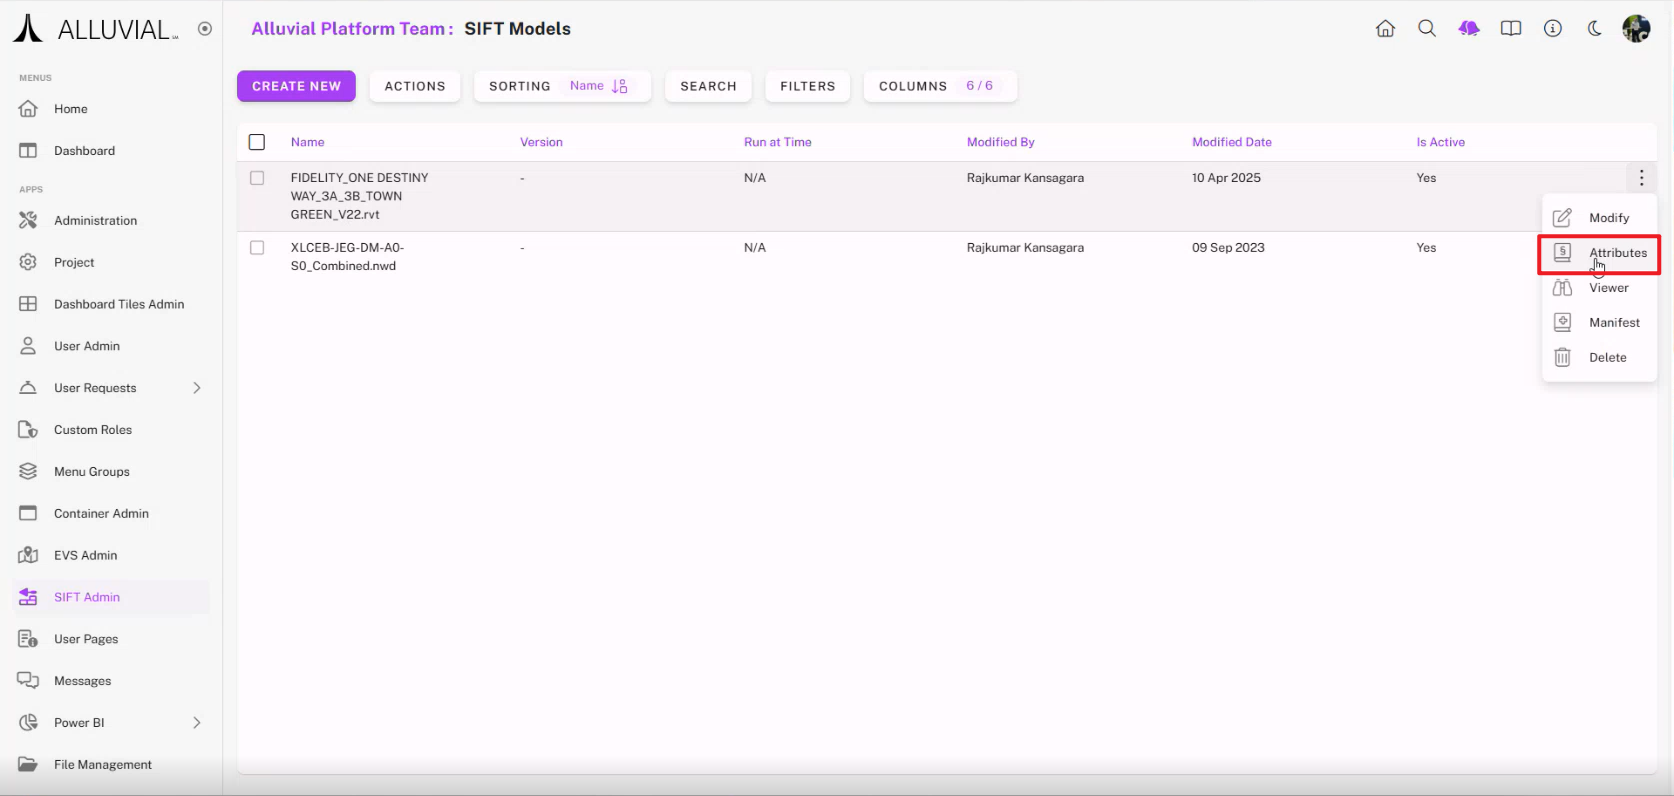
- Wait while attribute extraction runs in the background.
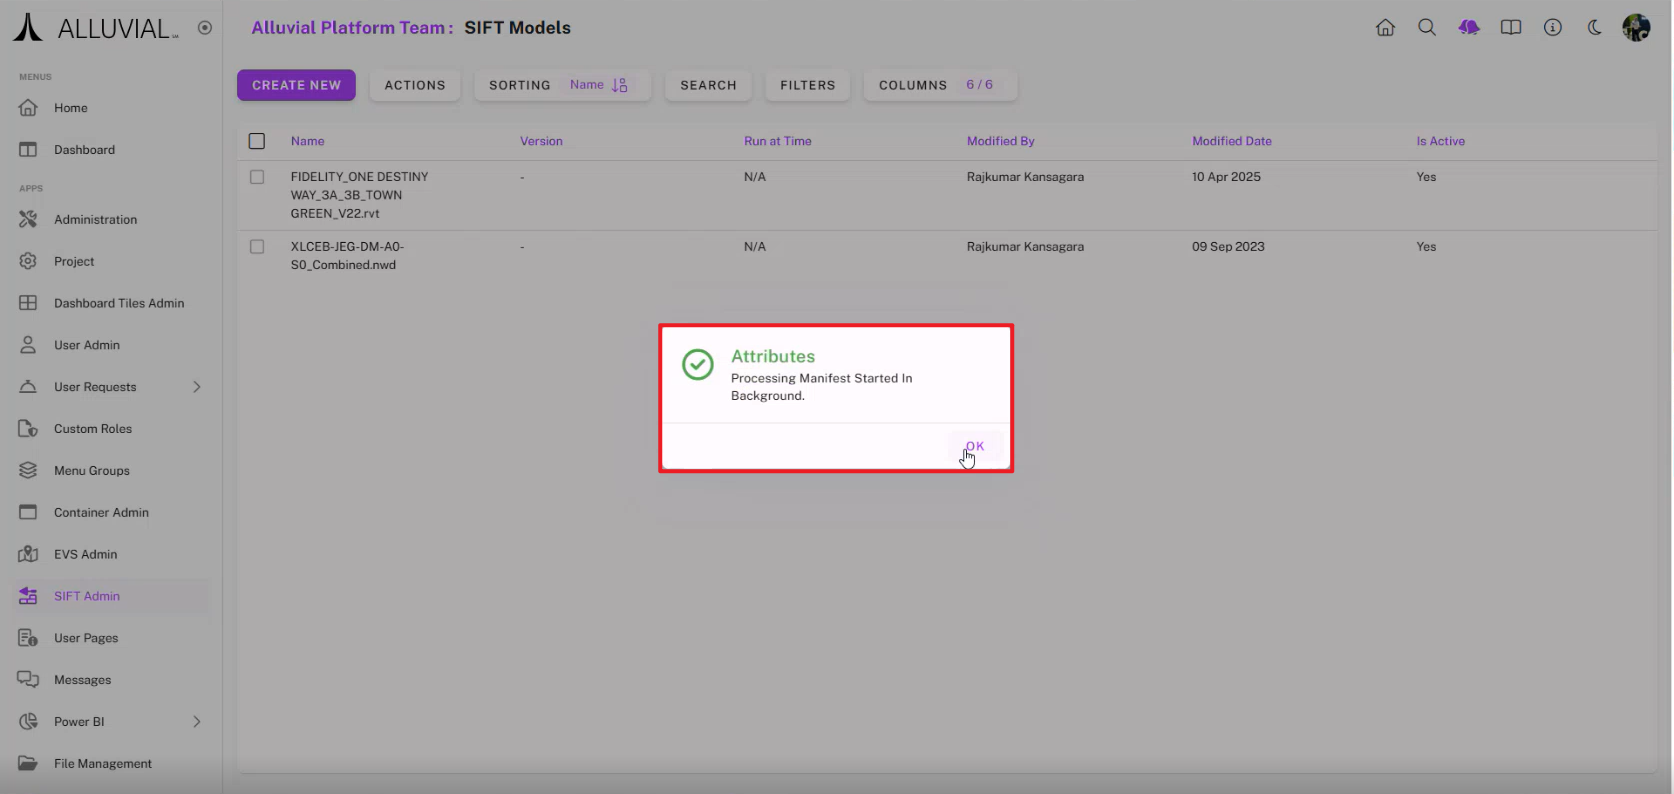
IMPORTANT: Attribute extraction stores data in Azure Blob Storage and may take time depending on model size.
- When extraction completes, review the notification.
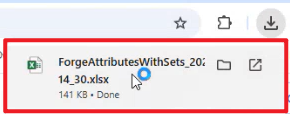
- Export the processed attributes to
.xlsxif you want a reference list for later attribute selection.
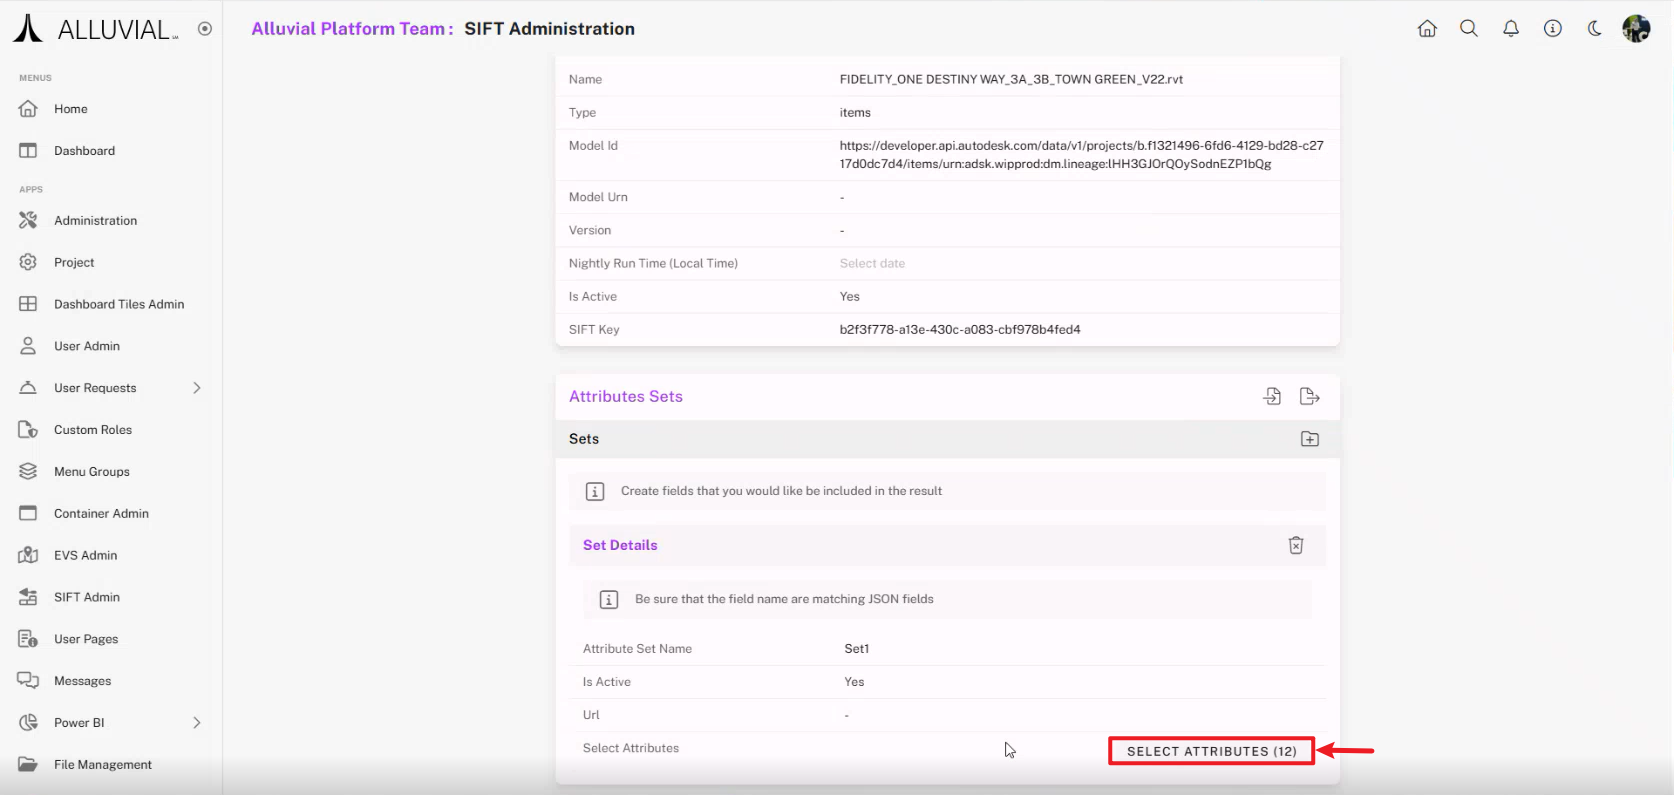
Select Attributes
- On the SIFT Search page, click the model name.
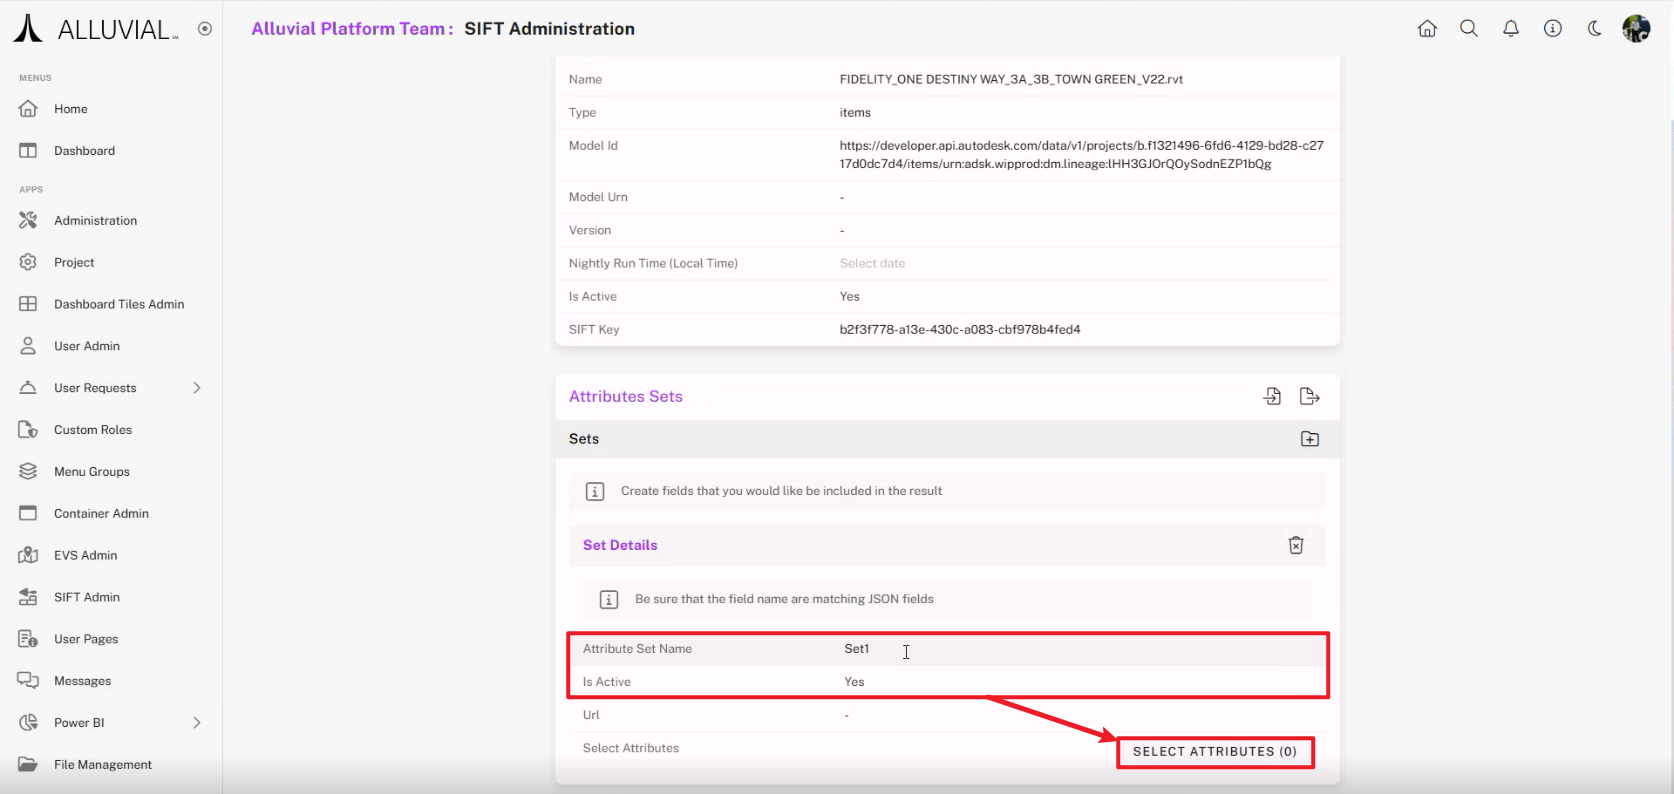
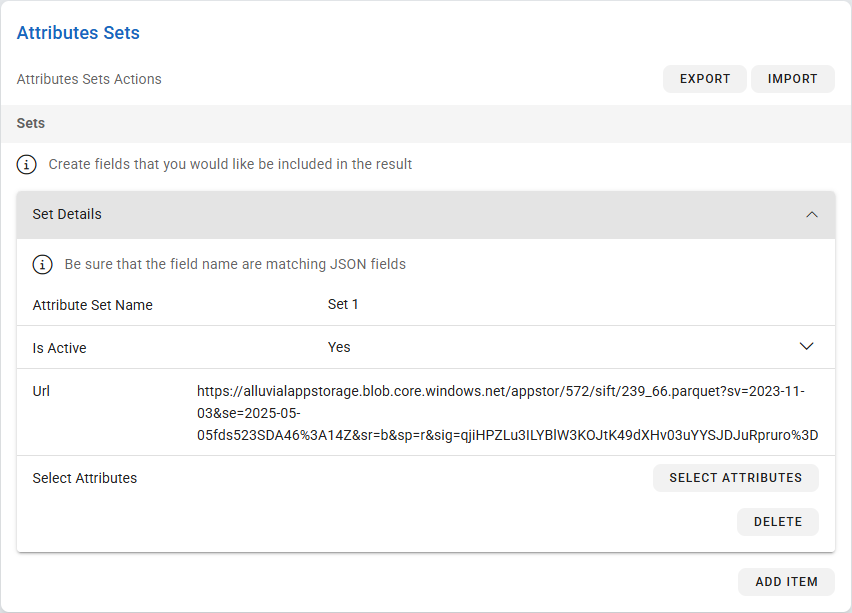
- In Attribute Sets, click Add new item.
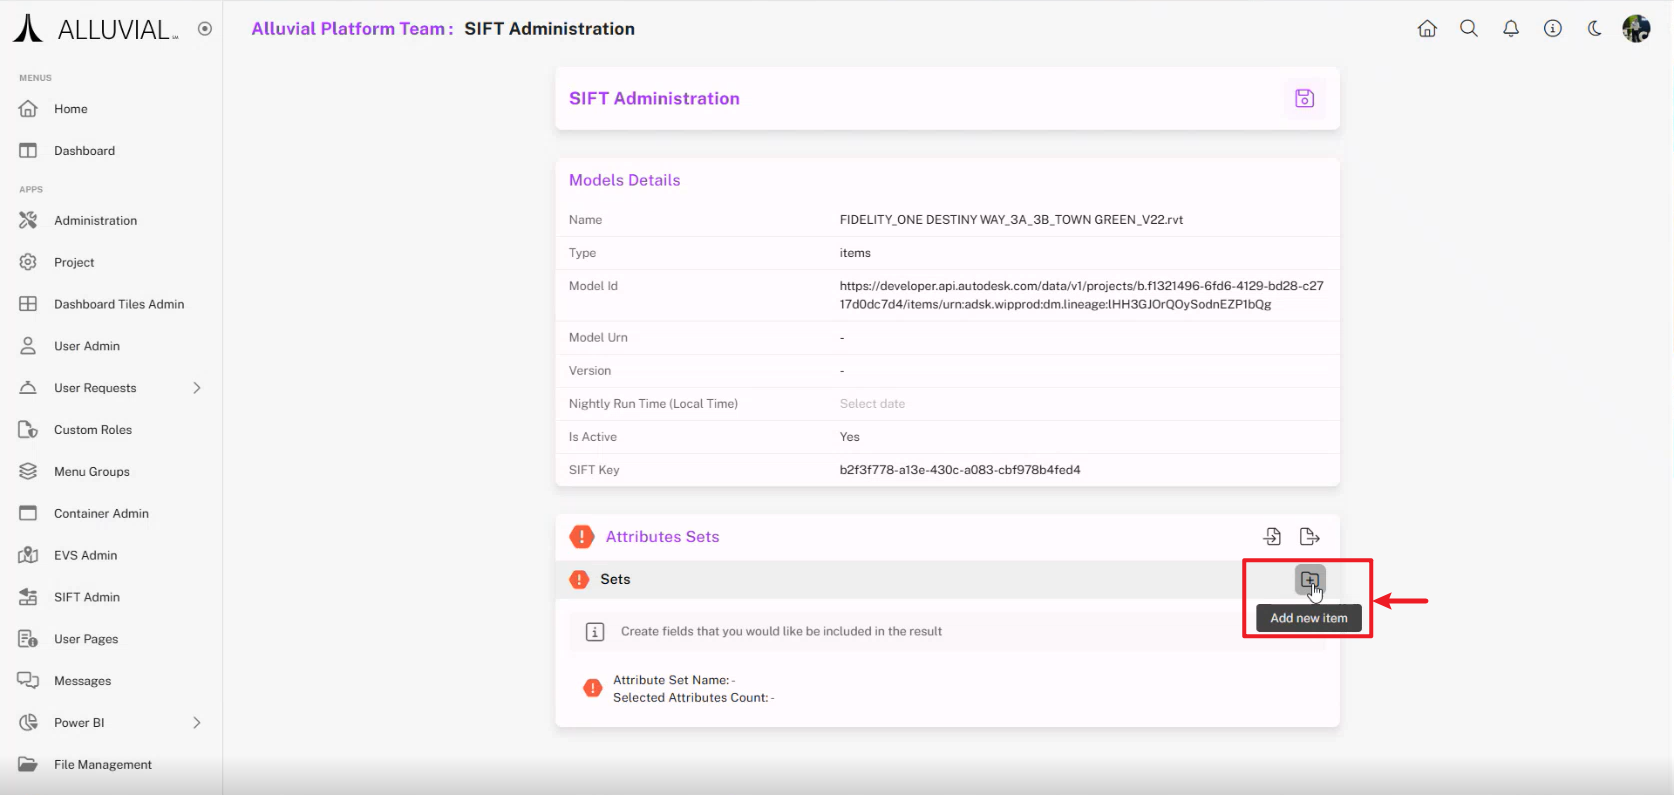
- Enter an Attribute Set Name and set its status to active if needed.
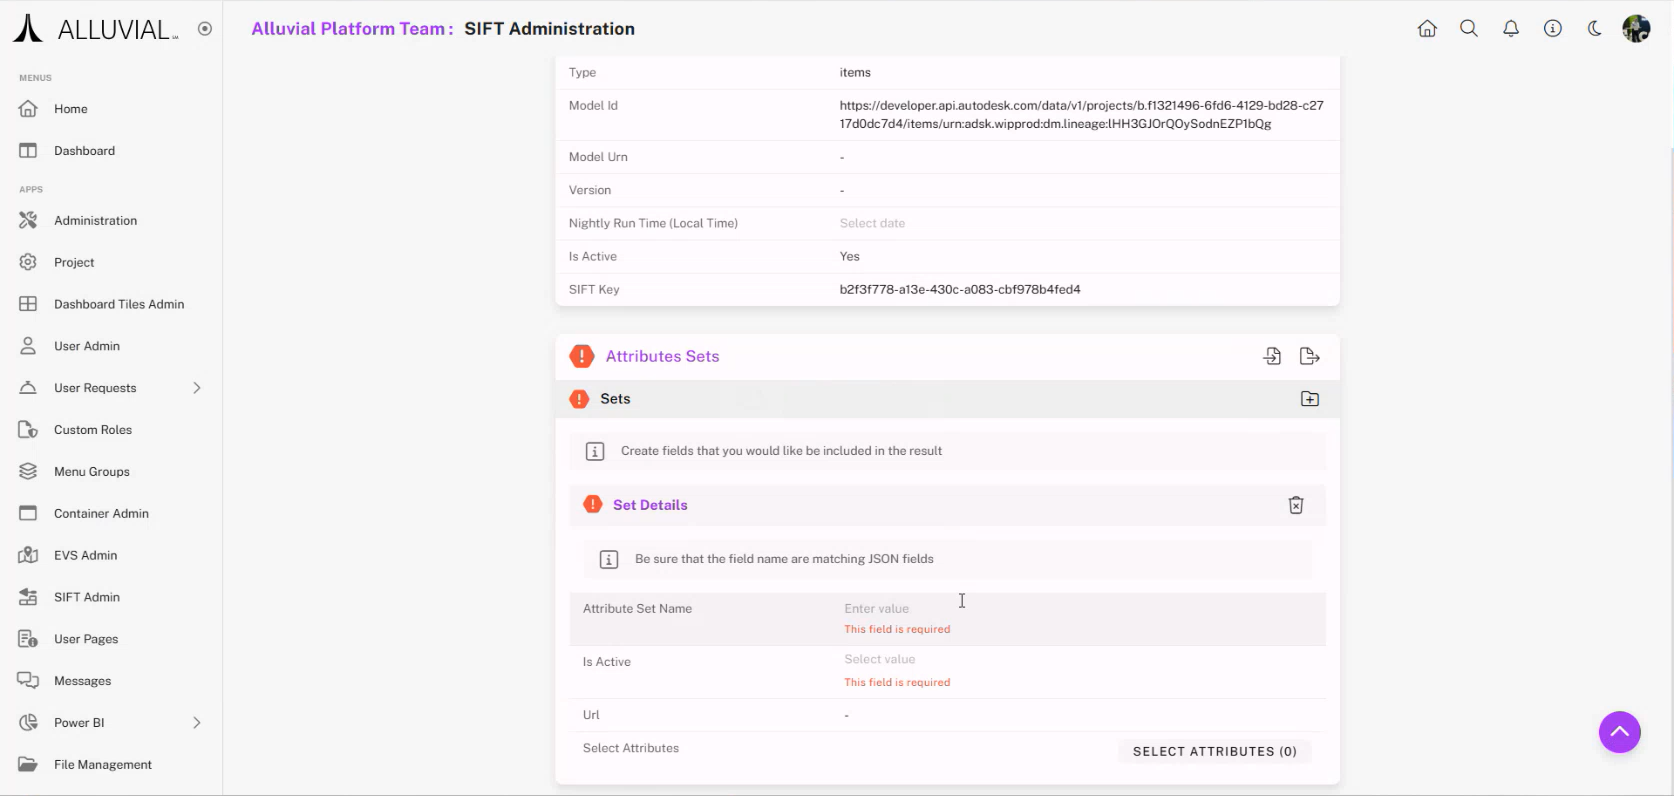
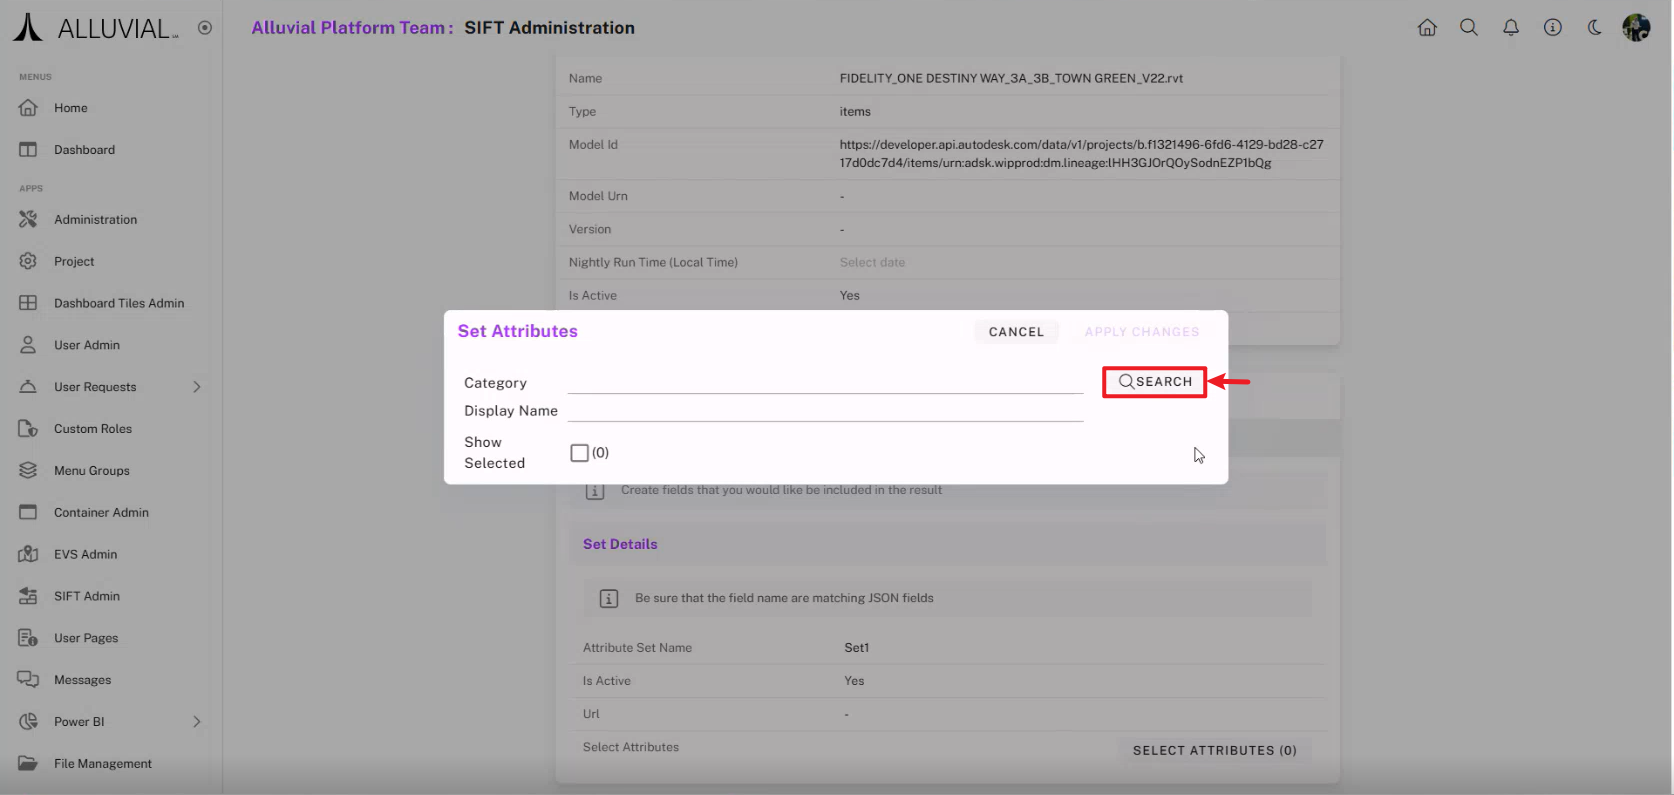
- Click SELECT ATTRIBUTES (0).
- On the search page, click SEARCH without filters to view all available attributes, or apply filters to narrow the list.
IMPORTANT: If you exported the
.xlsxfile during attribute extraction, use it to identify the attributes you want before making your final selection.
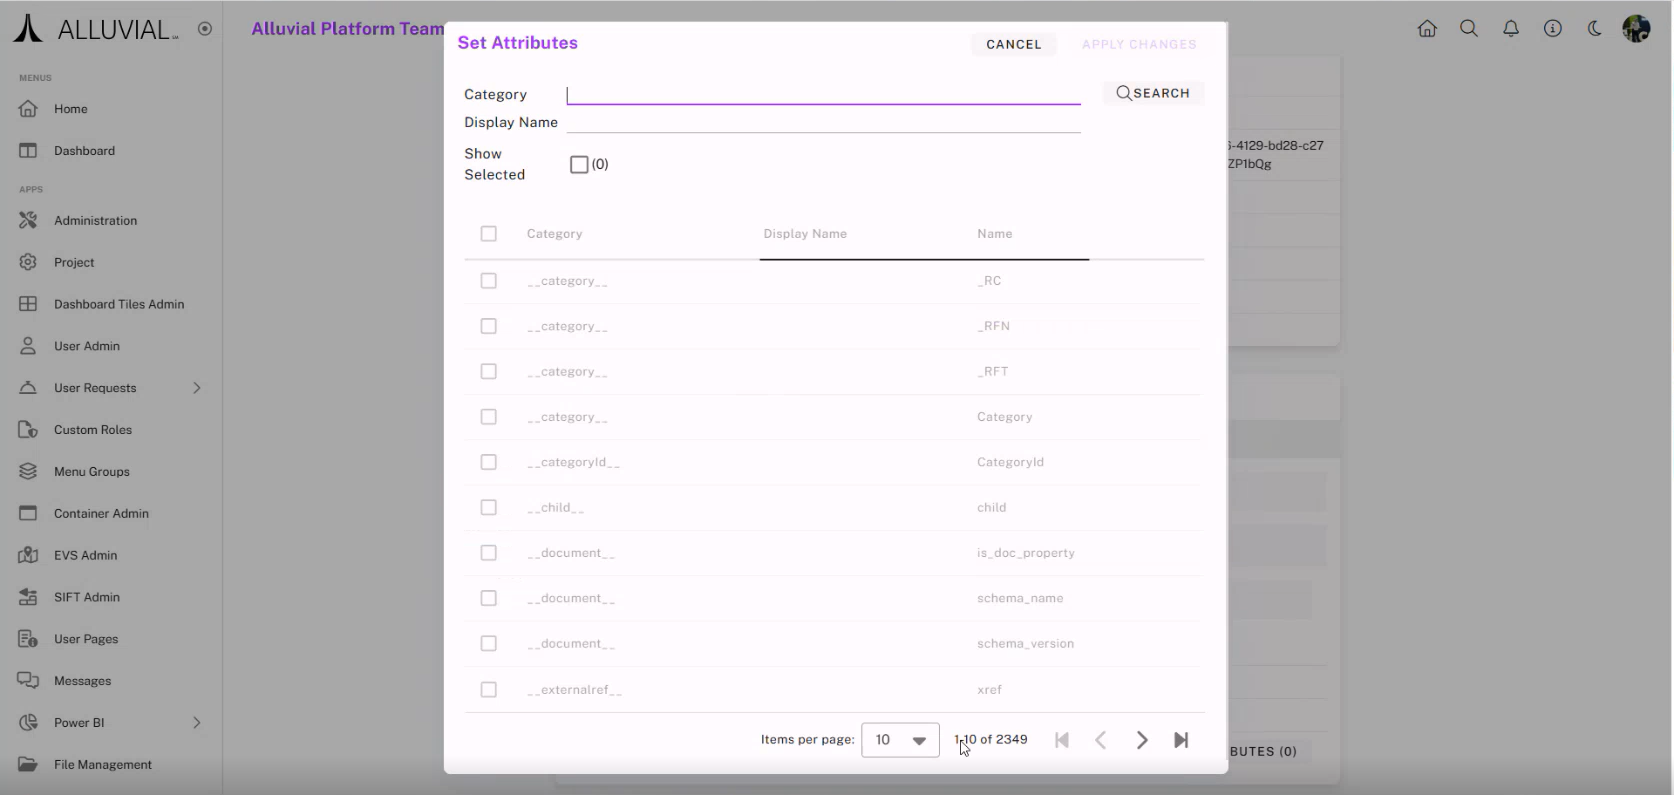
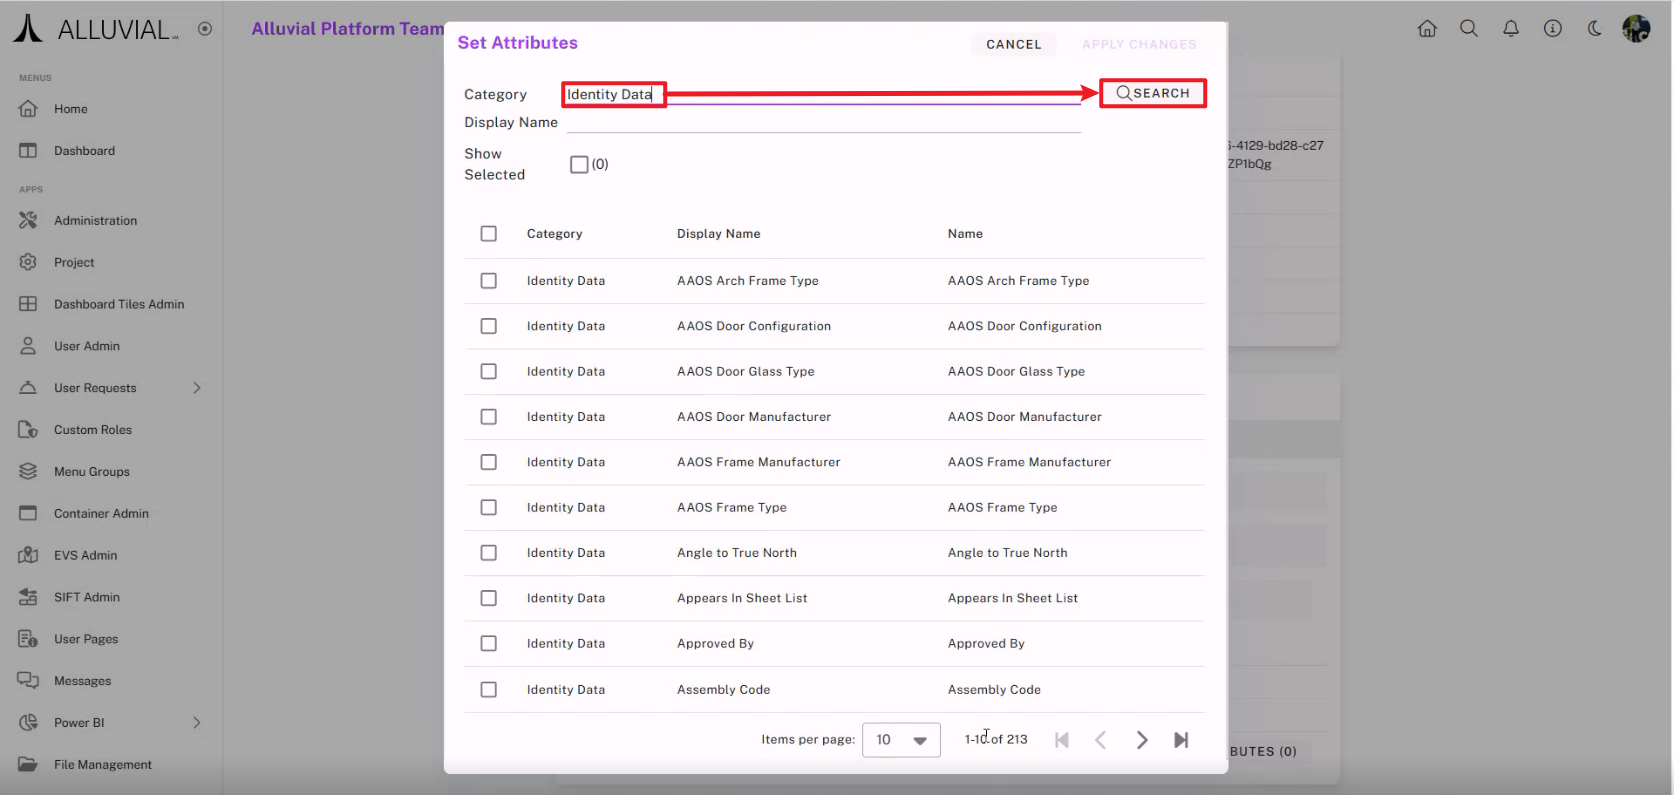
- Select the fields you need, click Apply Changes, and then click Save.
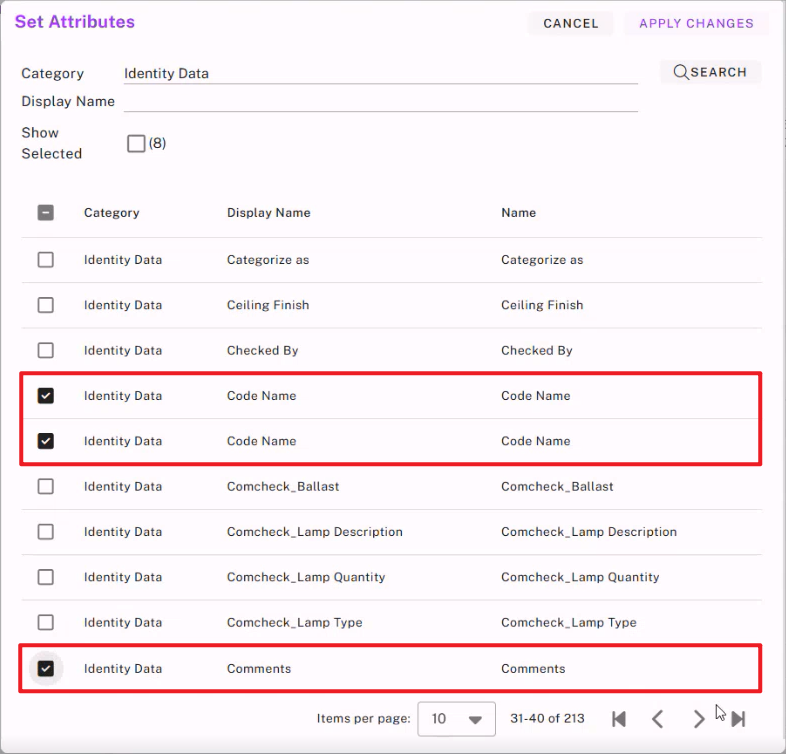
IMPORTANT: Selecting fewer attributes improves processing time and Power BI performance.
- In the Set Attributes window, click APPLY CHANGES to confirm.
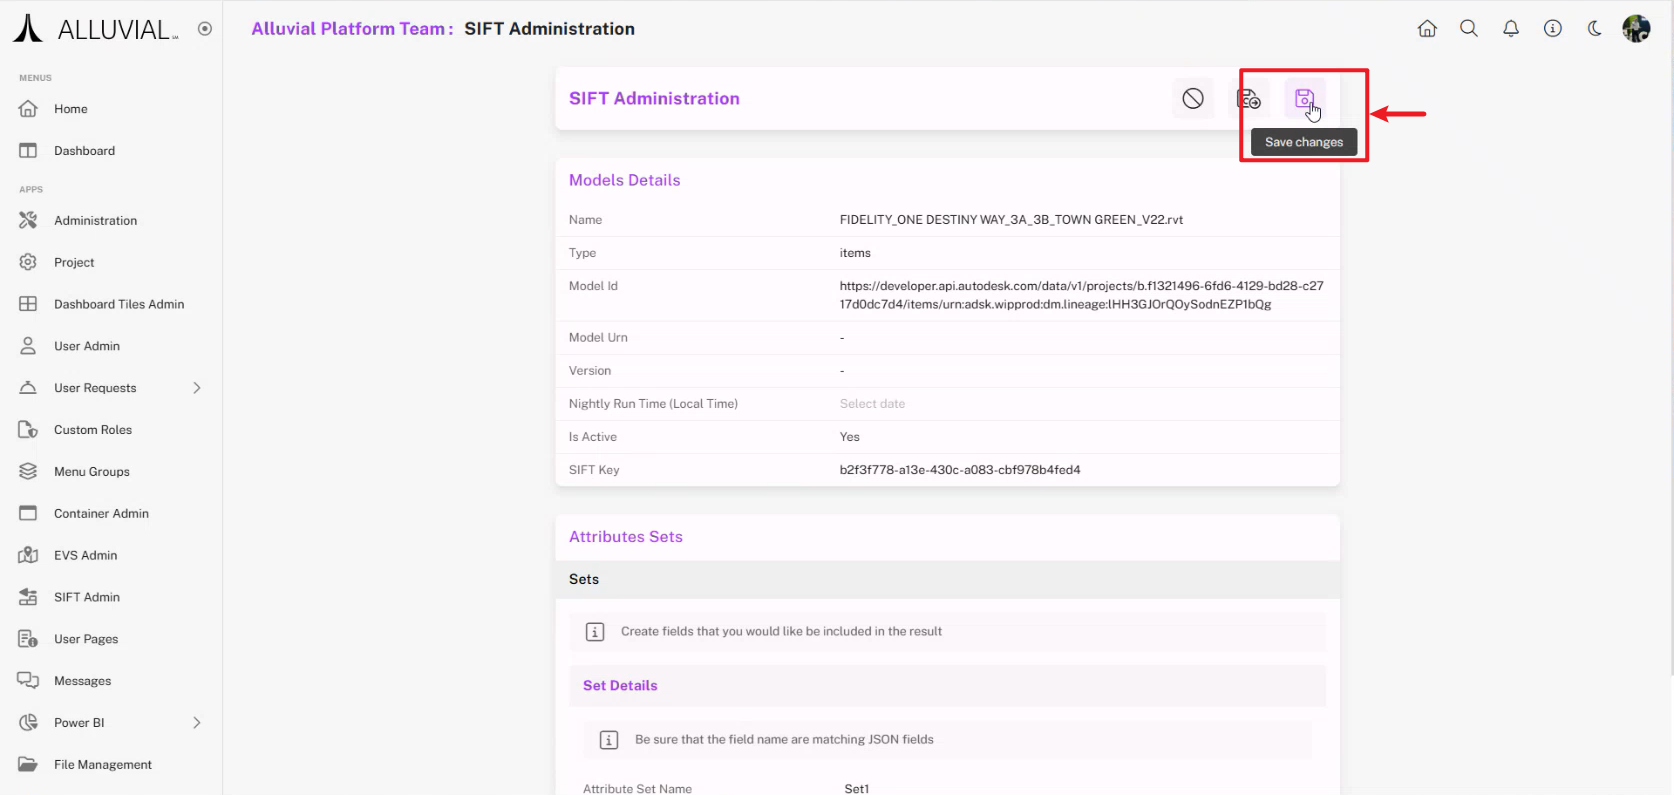
- Save the model.
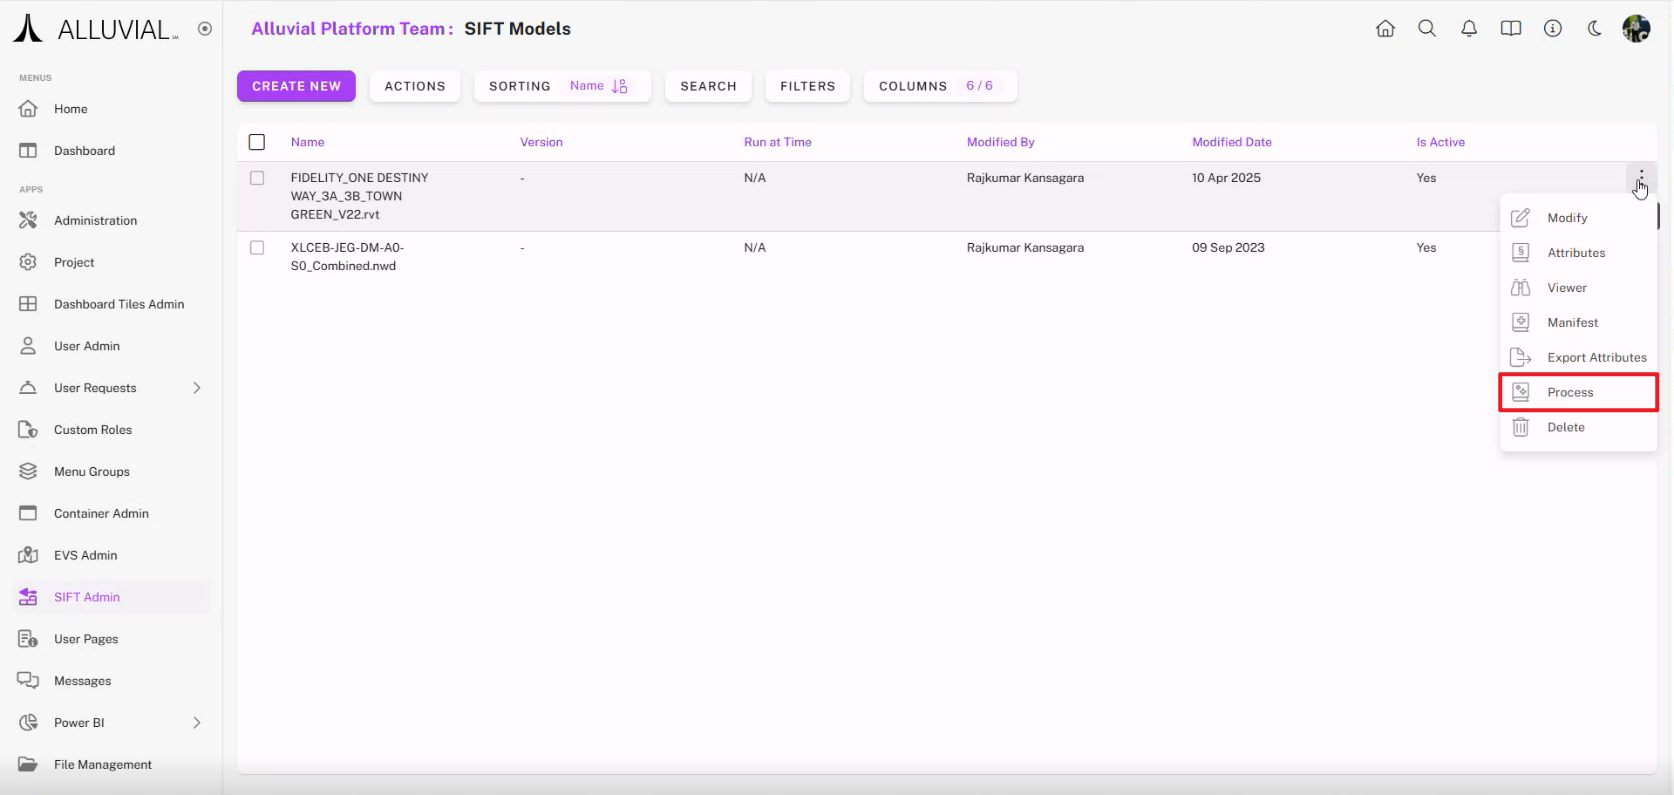
Process the Model
- Open the action menu for your model and select Process.
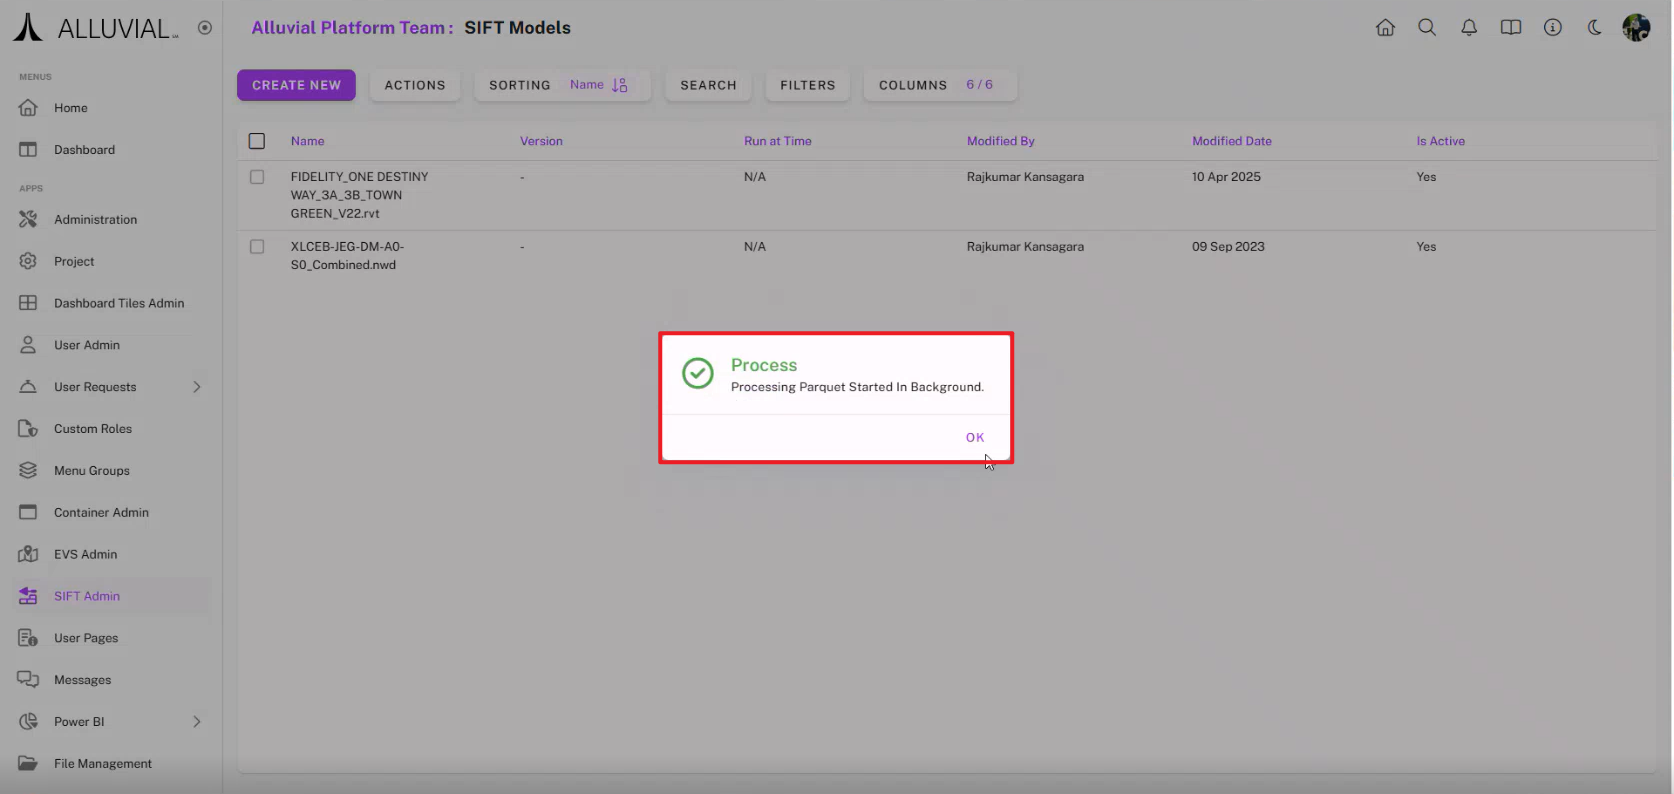
- Wait while processing runs in the background.
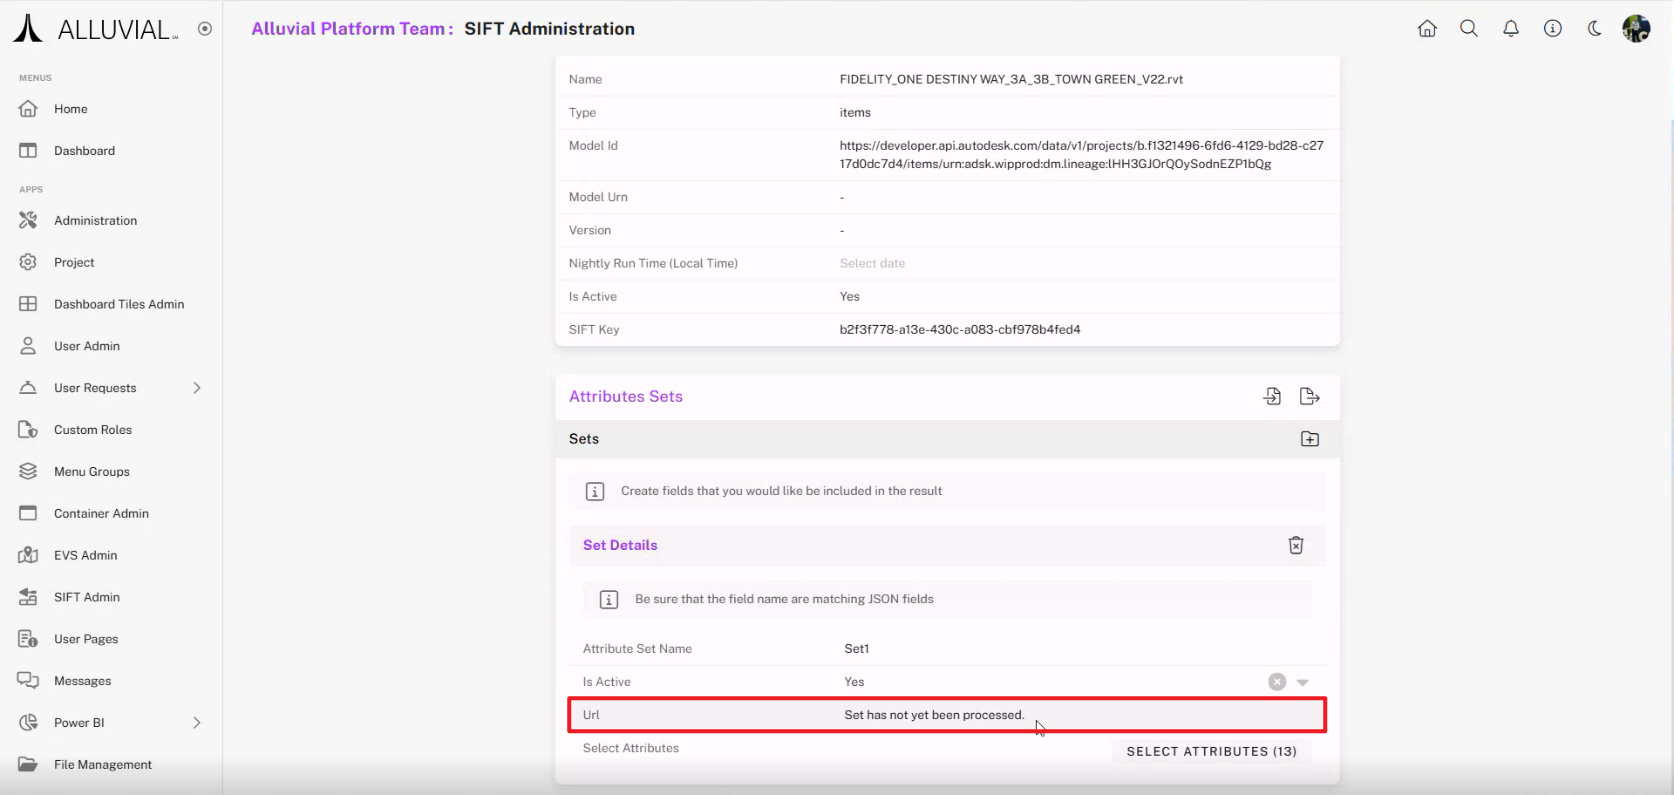
- If processing is still underway, the details page shows Set has not yet been processed.
- When processing completes, review the notification.
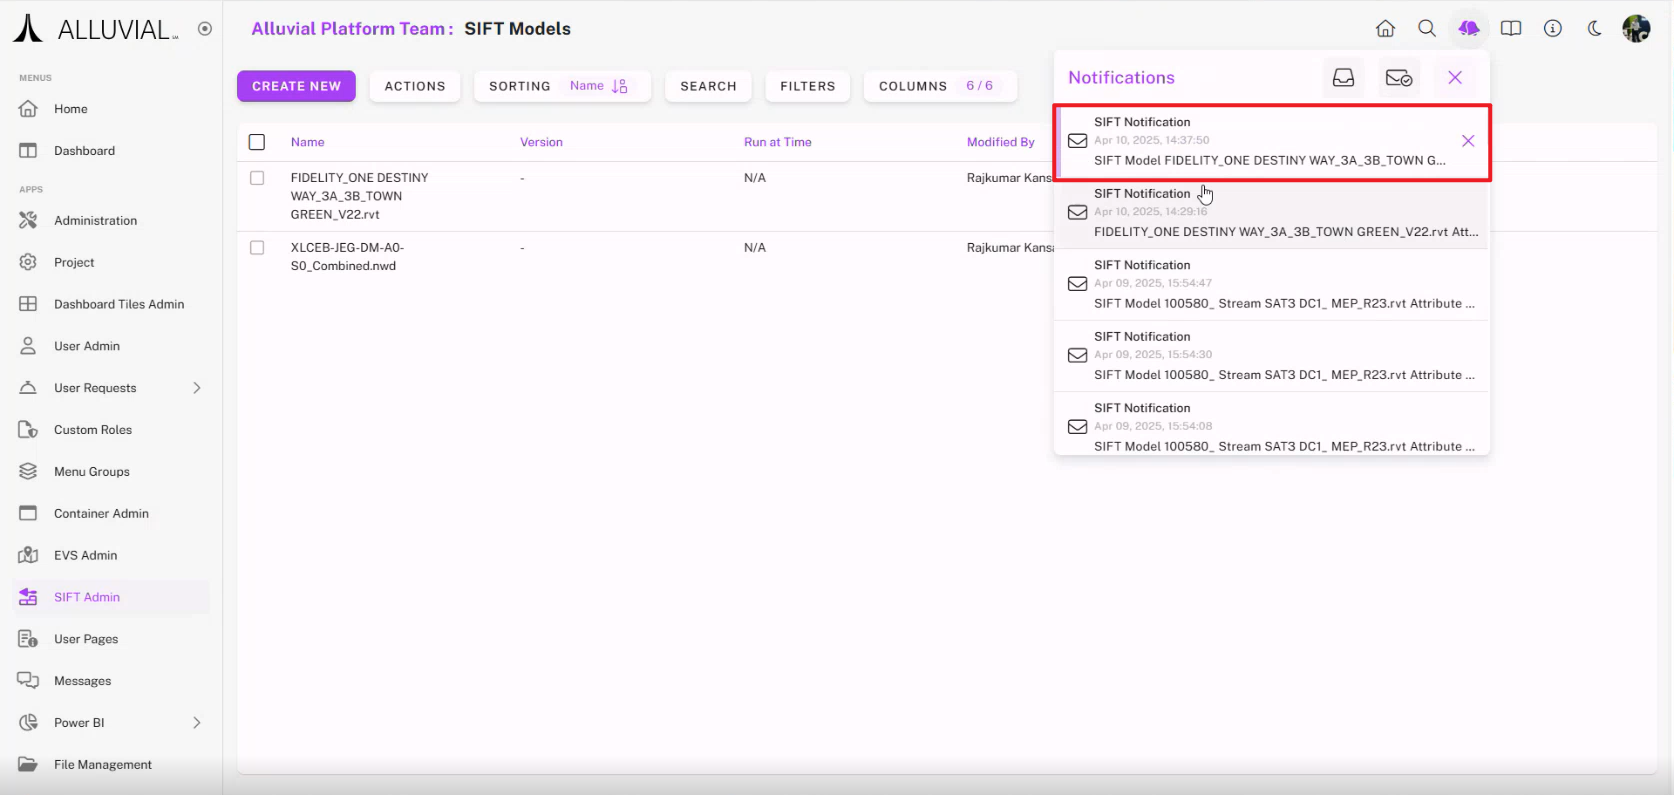
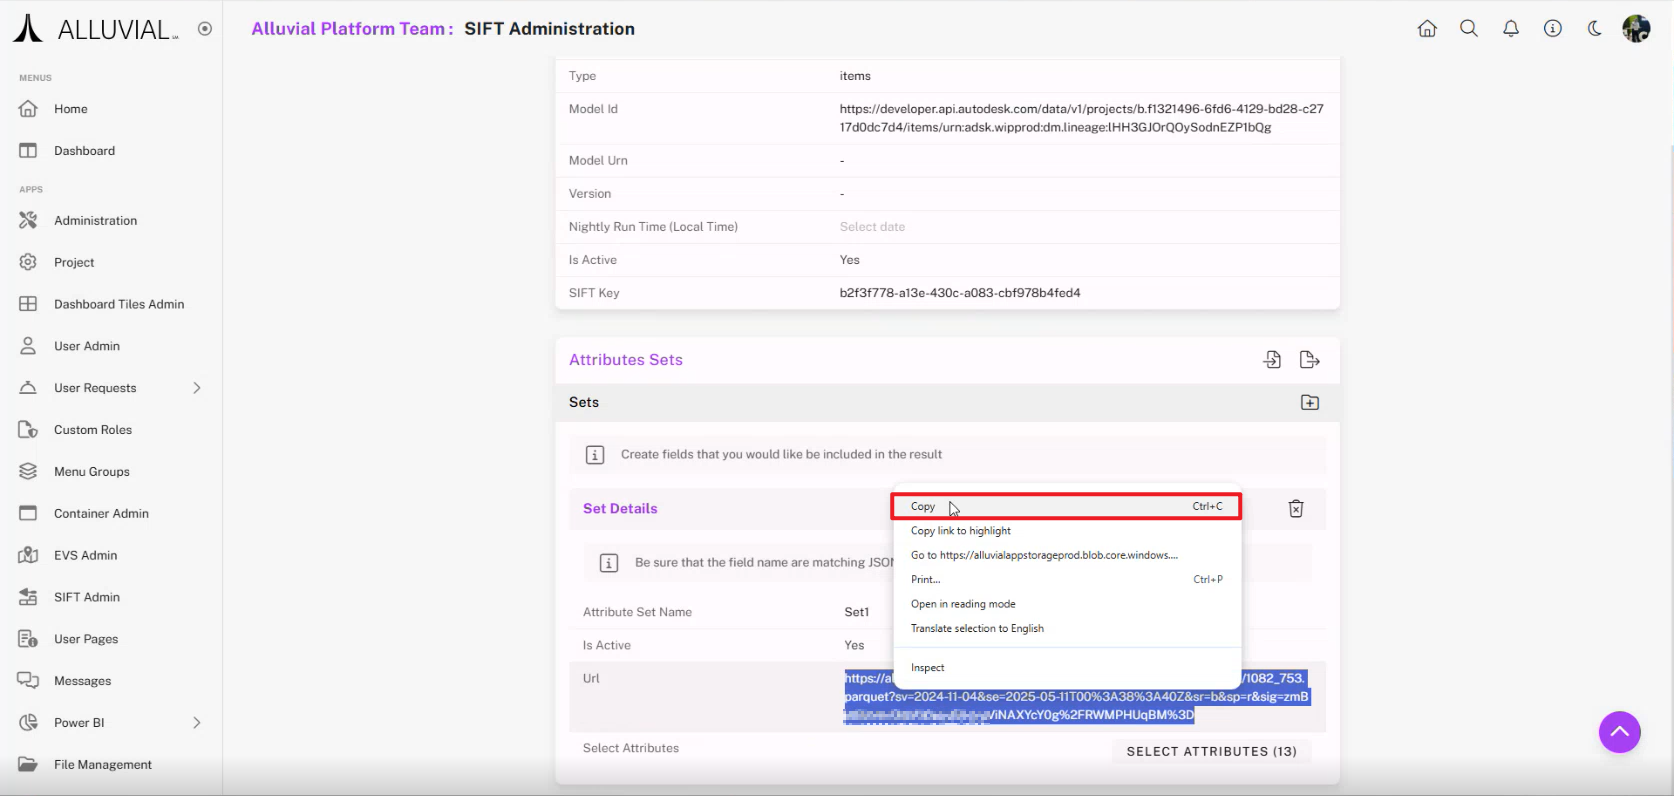
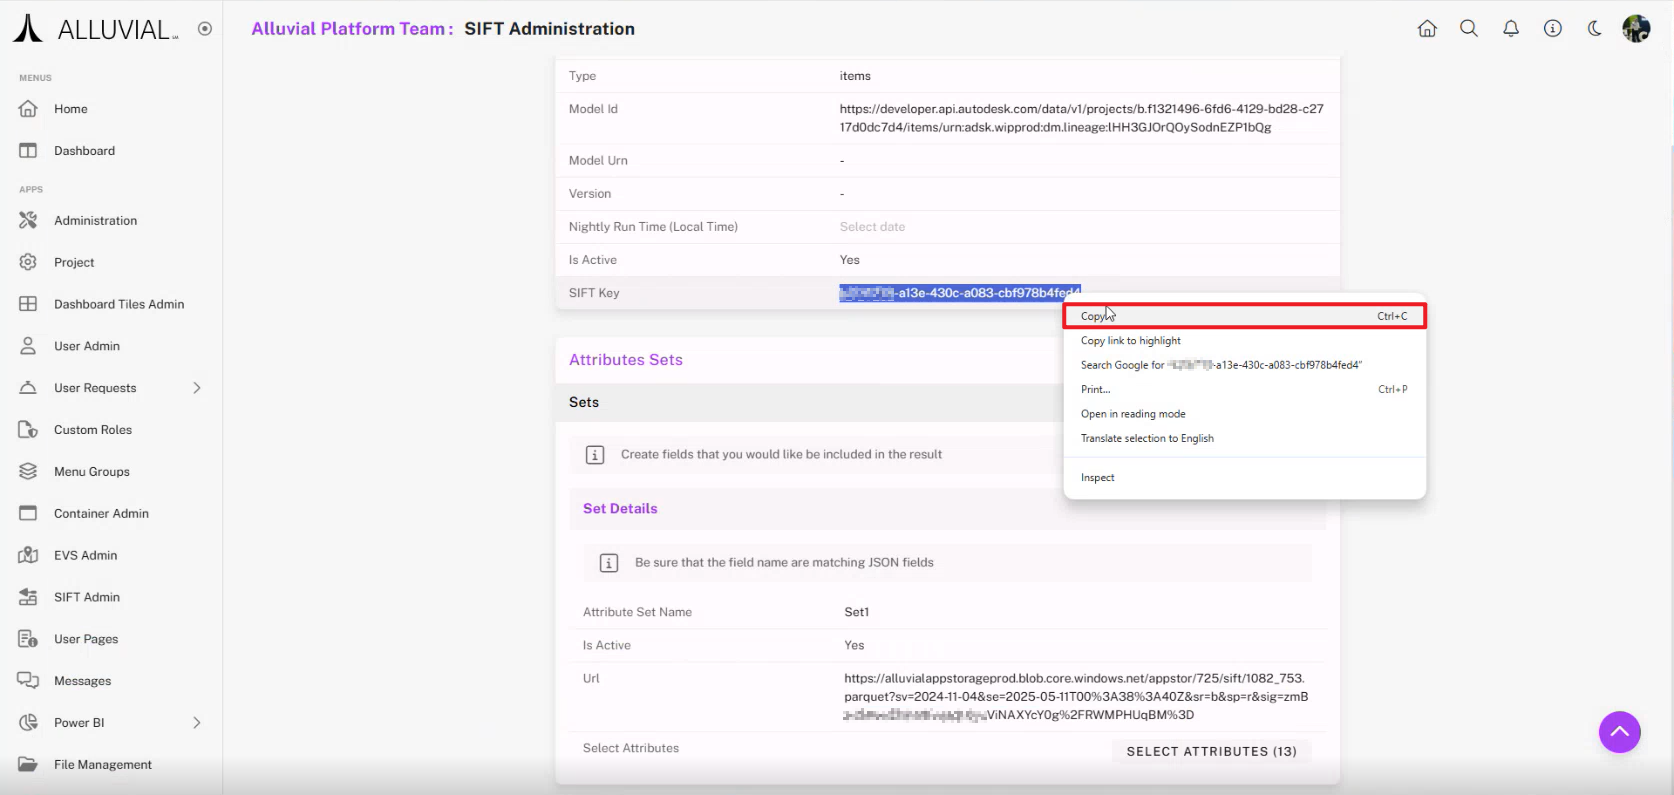
- Copy the generated URL for the attribute set. This URL includes the Azure SAS token used by Power BI.
IMPORTANT: SAS tokens expire after about 30 days. If a Power BI report stops loading data, refresh the token from the model details page and update the report connection.
Connect a Processed Model in Power BI
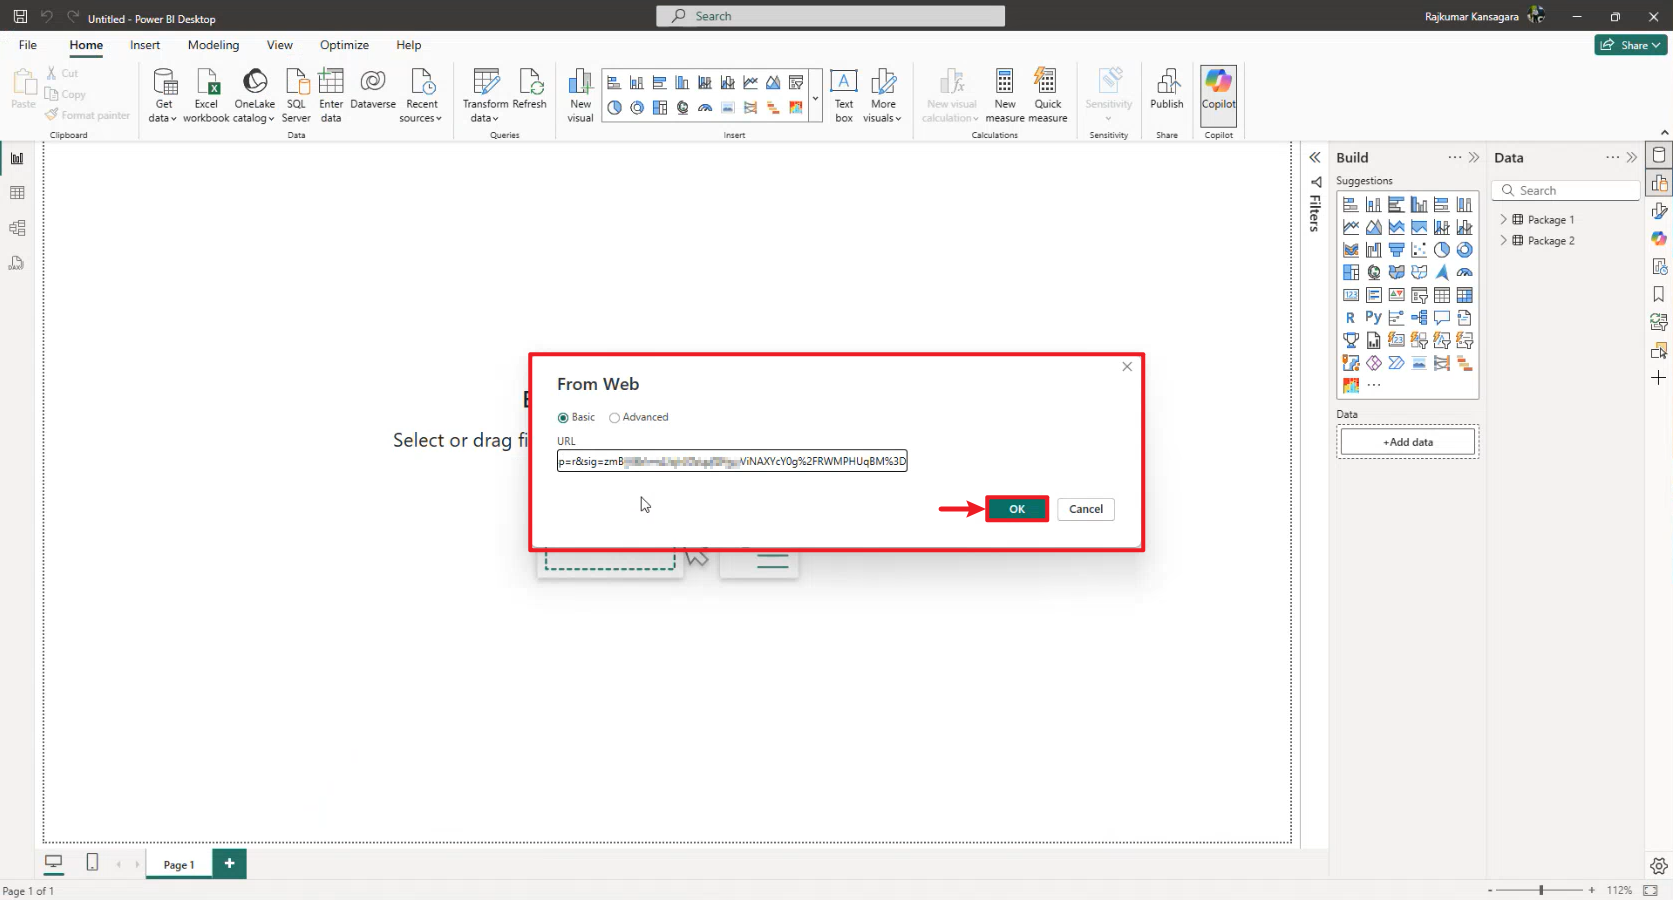
- In Power BI Desktop, select Get data, then choose Web.
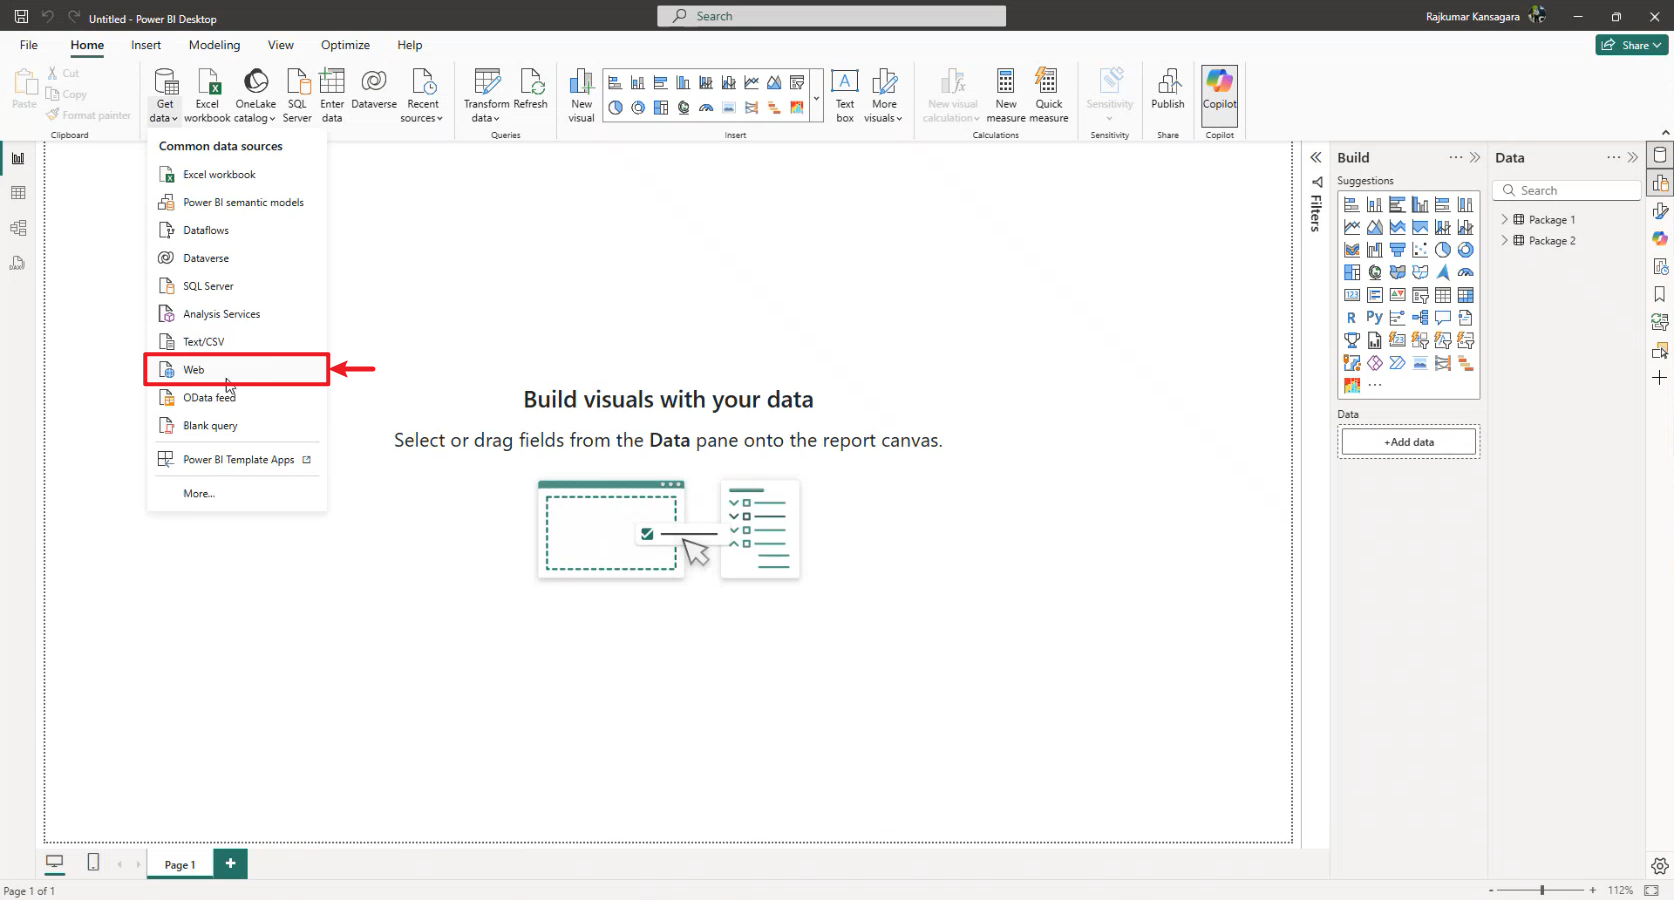
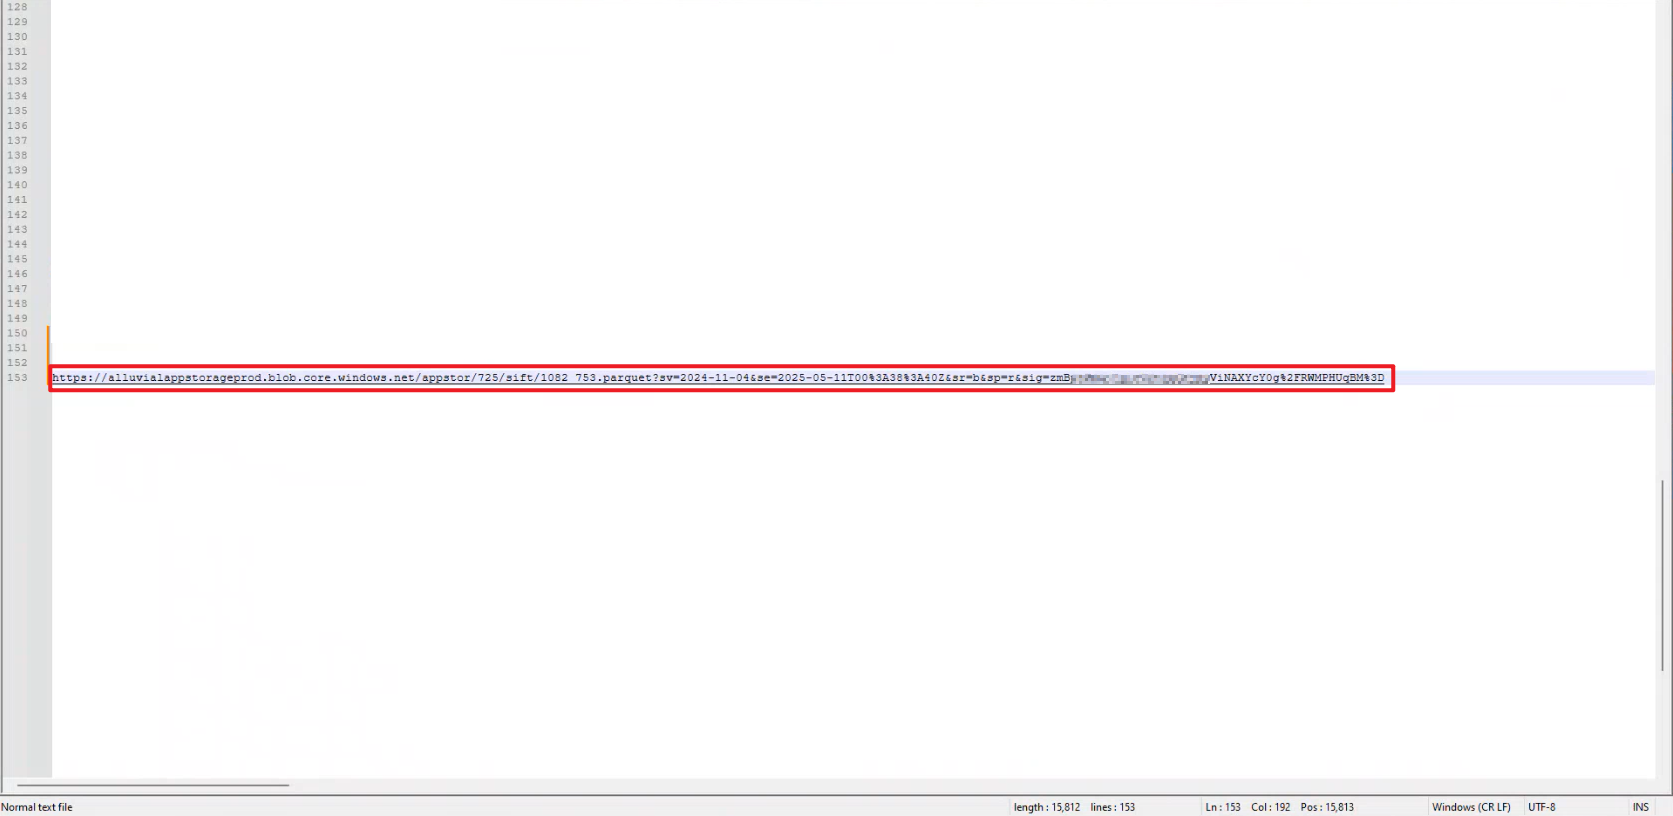
- Copy the processed model URL from SIFT.
- If pasting directly does not work, paste the URL into a text editor first, then copy it again.
- In the Web data connection window, paste the URL and click OK.
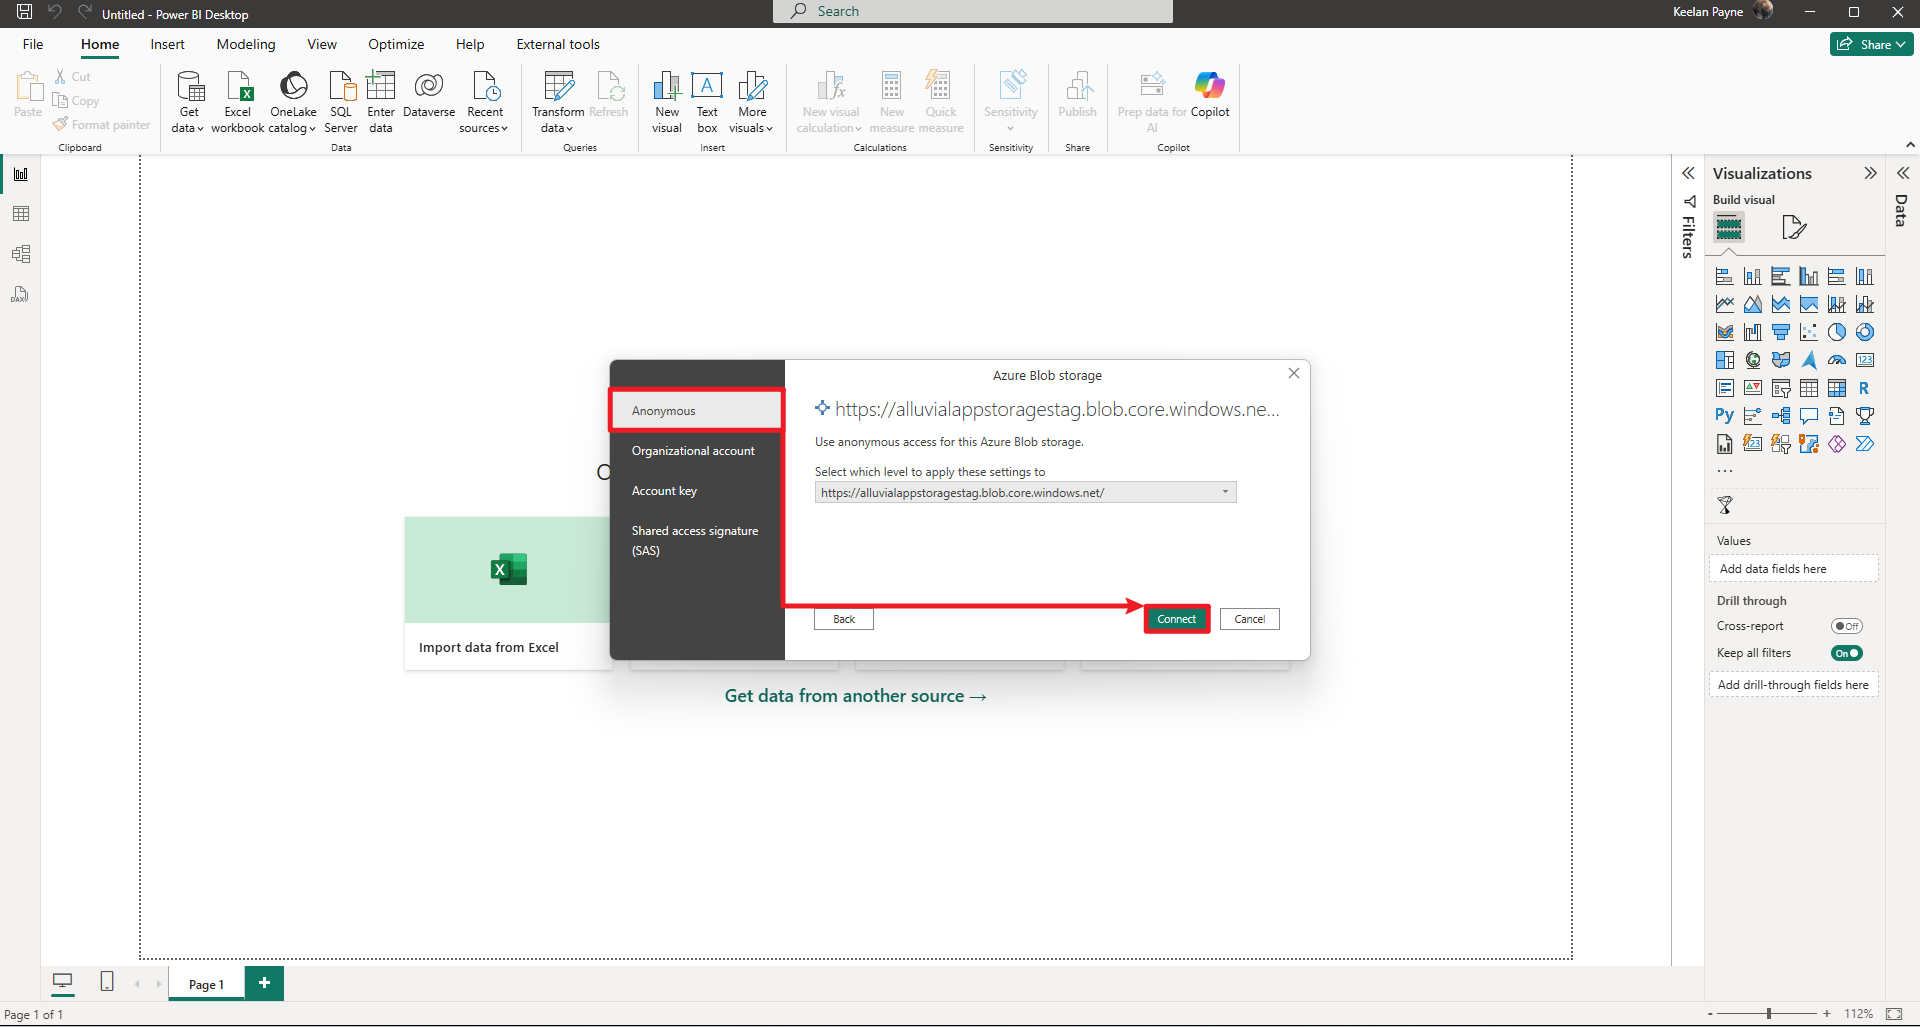
- When prompted, select Anonymous authentication and click Connect.
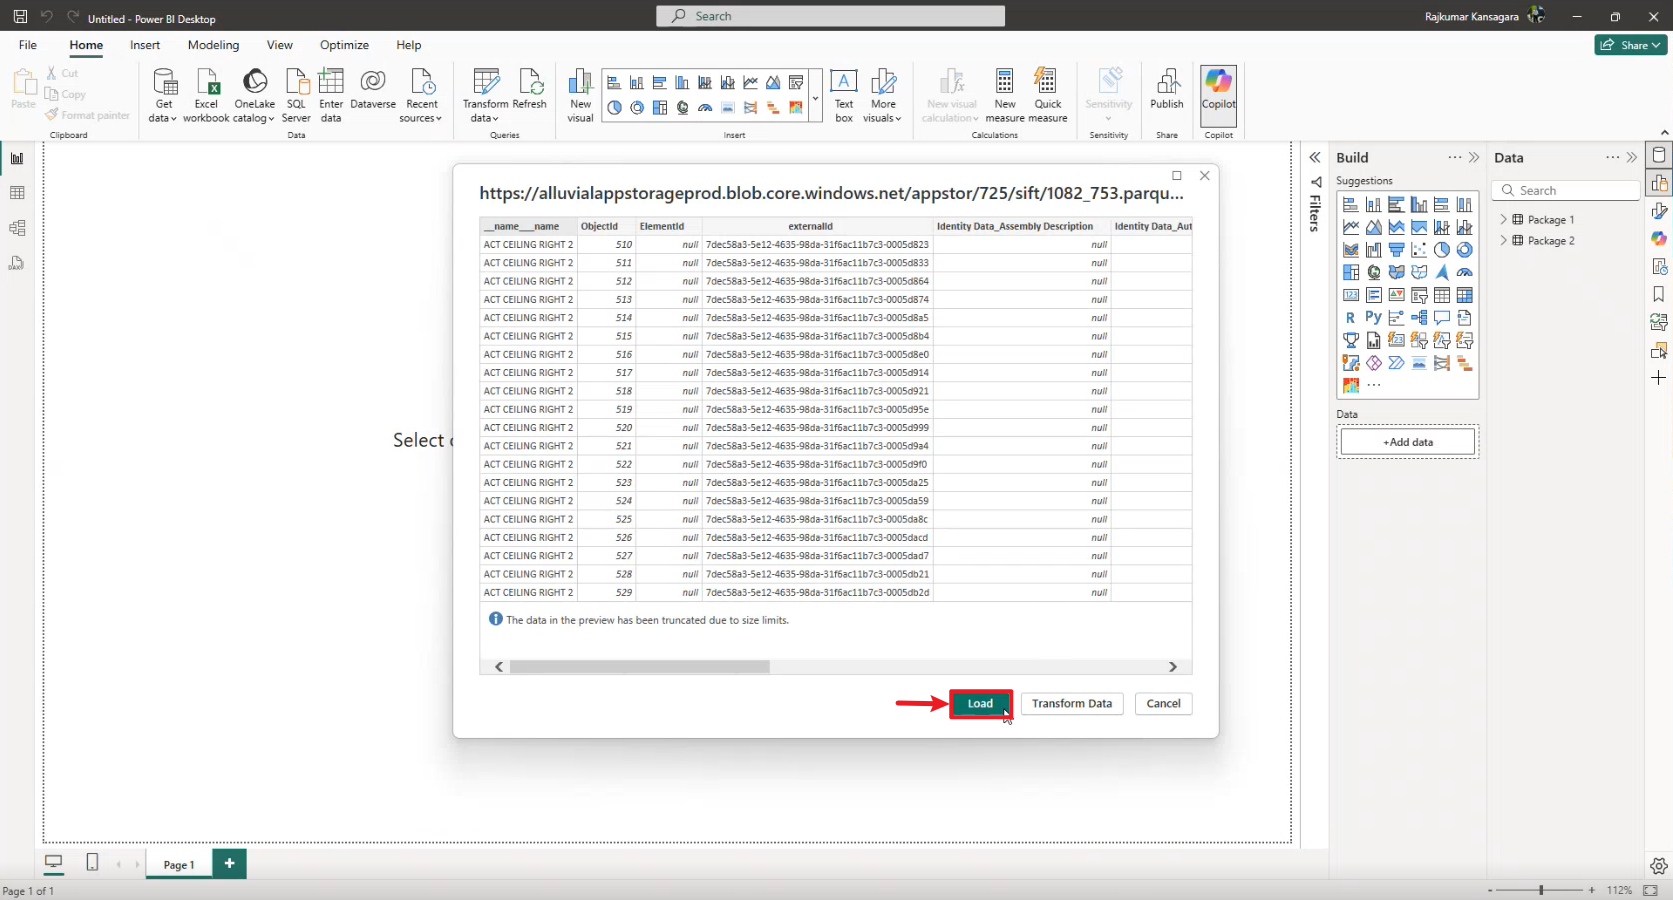
- Click Load unless you need additional transformations.
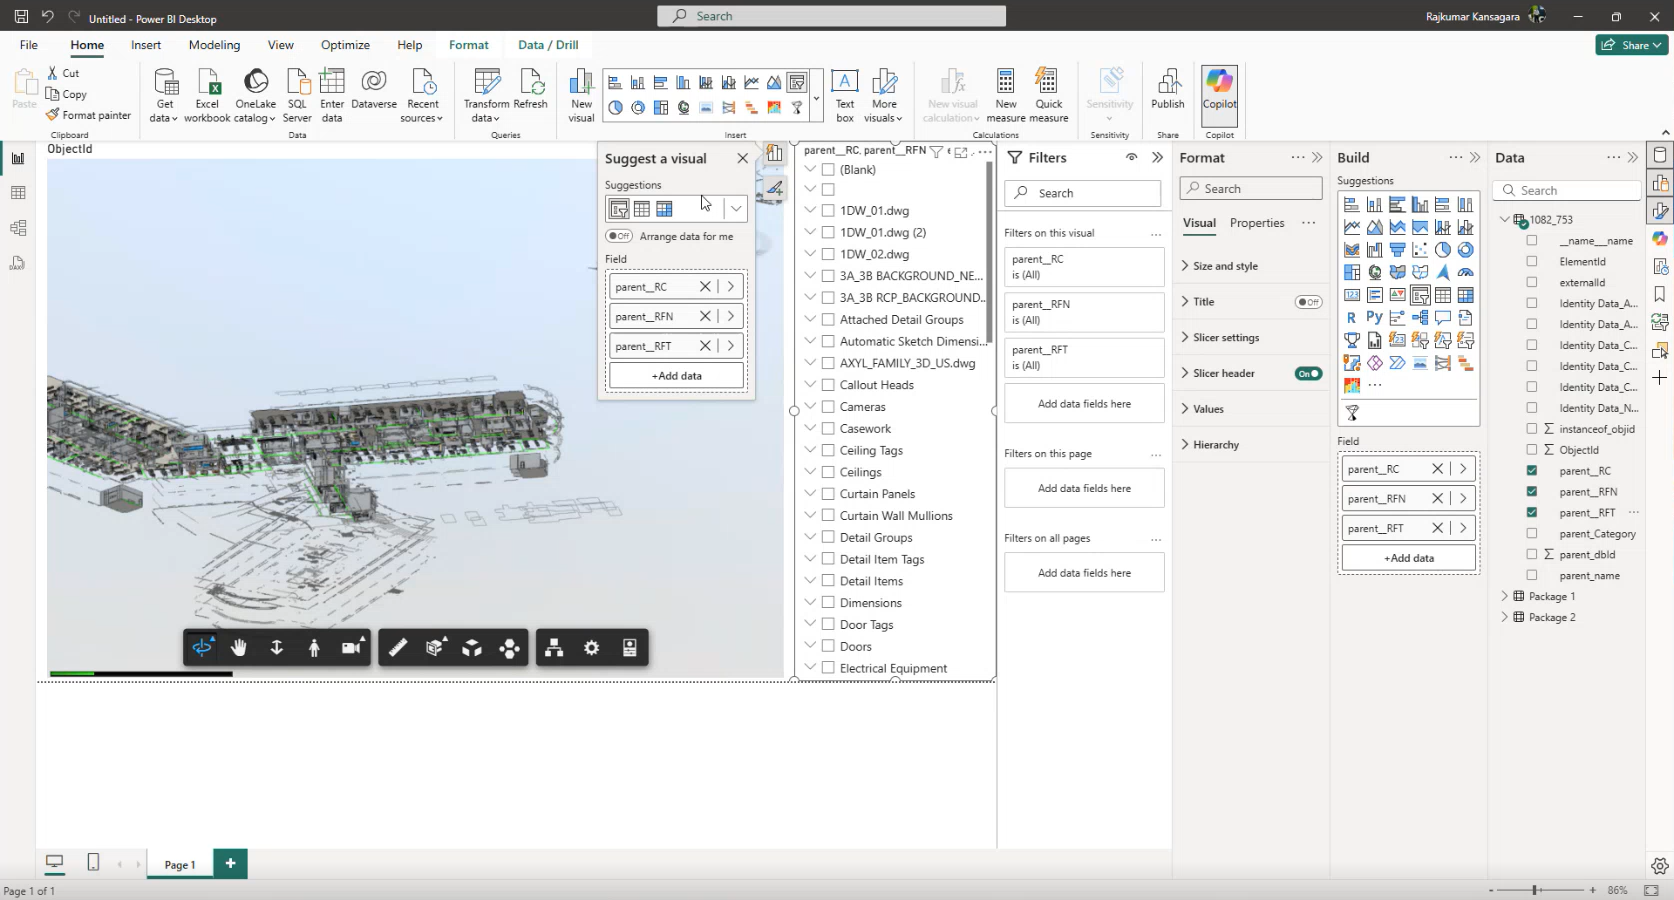
- Expand the connected model table.
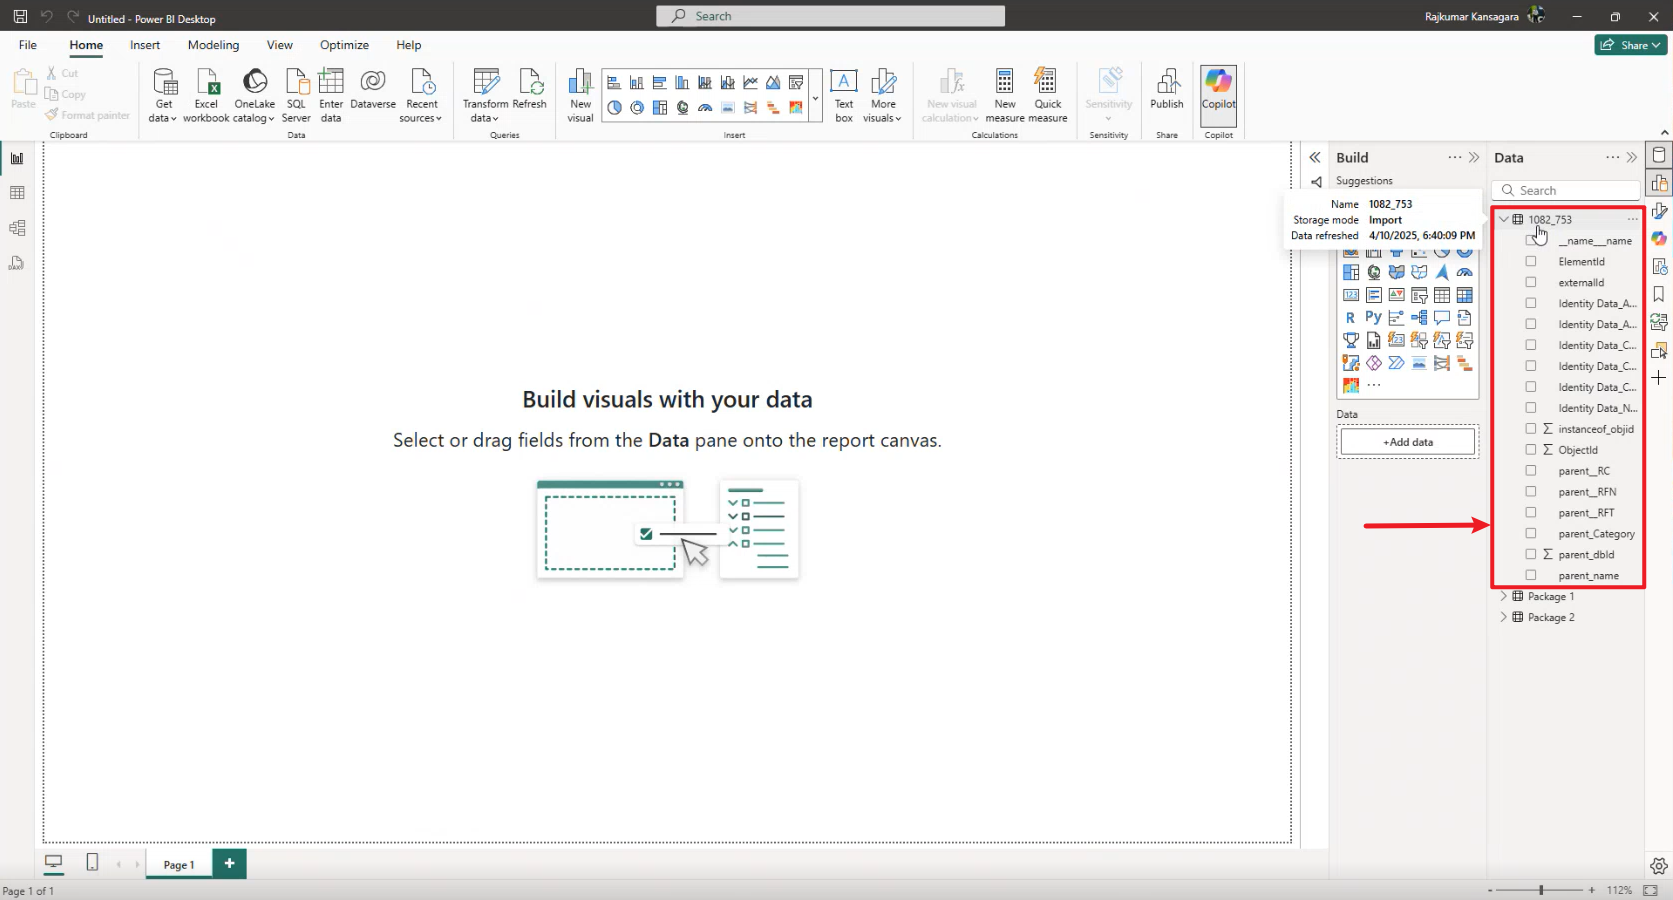
- In the SIFT visual:
- Under Forge Id, select the
ObjectIdfield. - Enter the SIFT Key from the model details page.
- Under Forge Id, select the

You can now explore your BIM data in Power BI.
Additional Functionality
Refresh an Expired SAS Token
If a Power BI report connects to a SIFT-generated Parquet file through a URL that includes a SAS token, that token will eventually expire.
A token may have expired if:
- Parquet-based visuals fail to refresh
- Power Query transformations show connection errors
Identify an Expired Connection in Power BI
- Open the report in Power BI Desktop.
- In Power Query Editor, inspect the data source URL.
- If the URL contains a SAS token and the query shows errors, the connection likely needs a refreshed token.
Generate a New Token in SIFT
- Log in to Alluvial and open SIFT Administration.
- Select the model linked to your parquet file.
- In the Attribute Sets section, copy the URL. Visiting the model details page refreshes the SAS token automatically.
IMPORTANT: The SAS token is refreshed automatically every time you visit the model details page.
Update Your Power BI Report Connection
- Open the affected report in Power BI Desktop.
- Go to File → Options and settings → Data source settings.
- Locate the web connection with the expired token.
- Replace the old URL with the new one (including the refreshed SAS token).
- Click Close & Apply to load updated data.
For more details on modifying Power BI data source settings, see Power BI Data Source Settings.
Tips and Troubleshooting
- Expired token: Refresh the URL in SIFT and update the report connection.
- Missing data: Ensure attributes were selected and the model was saved before processing.
- Performance issues: Use fewer attributes and pause visuals while editing in Power BI.
IMPORTANT: You can pause visuals using the Power BI Optimize ribbon. Learn more here.